Web Demo
The web component acts as a demo for the whole MegaMatcher ID Server product. It is designed to show what functions are available in the product, and how to integrate them in the customers product. In this section we will review the main UI components and how the front end user sees it.
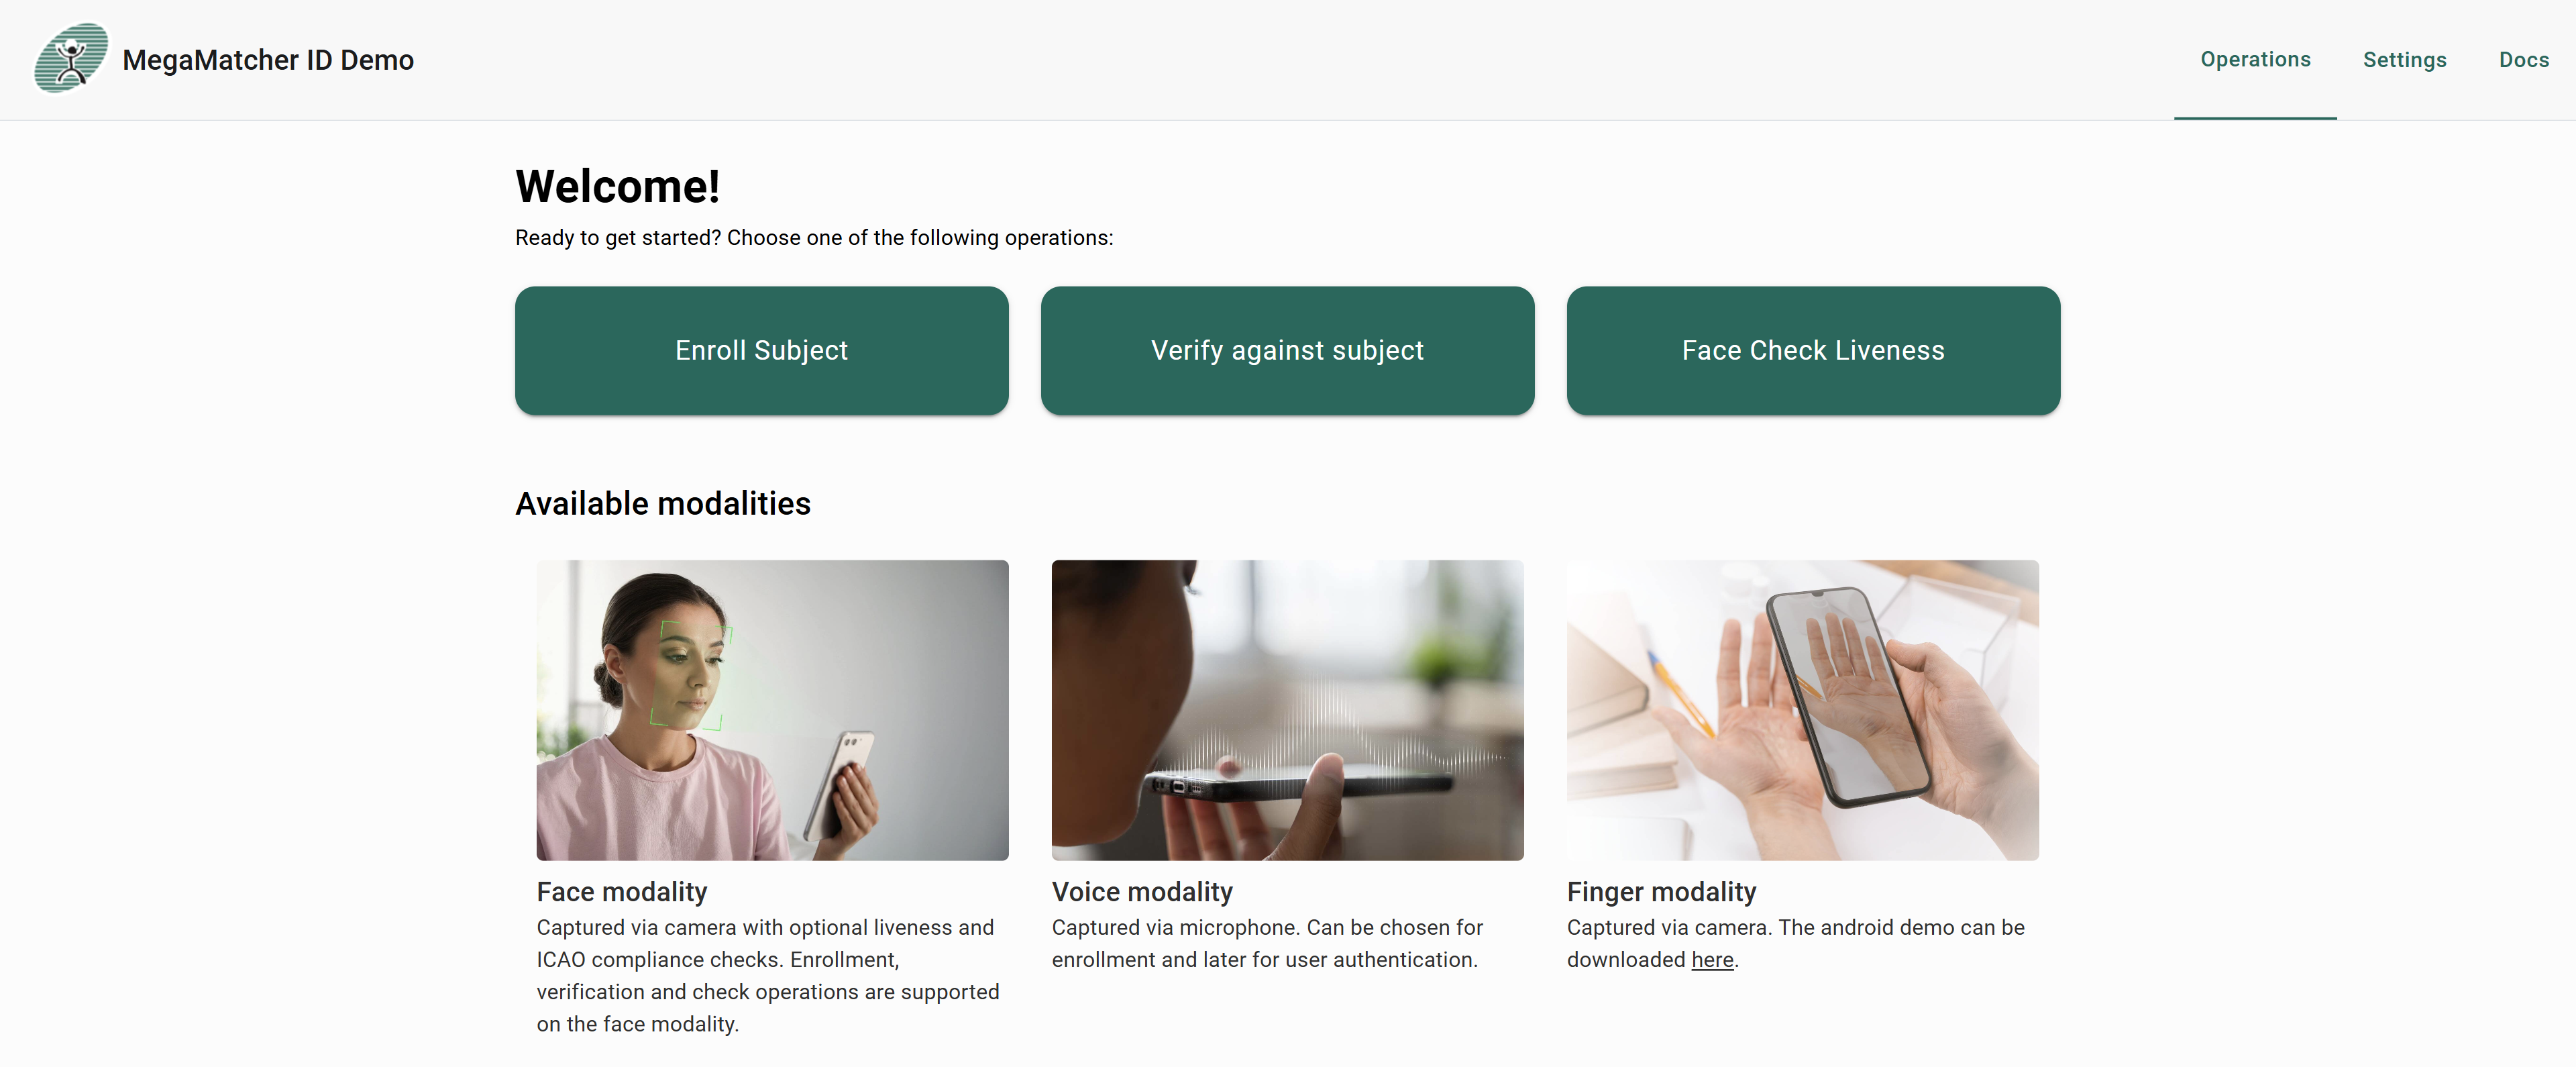
The default port for the Web Service is 40005 therefore it can be accessed by http://server_ip:40005/. As the port can be changed during server setup, url should be changed accordingly. After navigating to the url and allowing camera access, you will see the main view for the component:
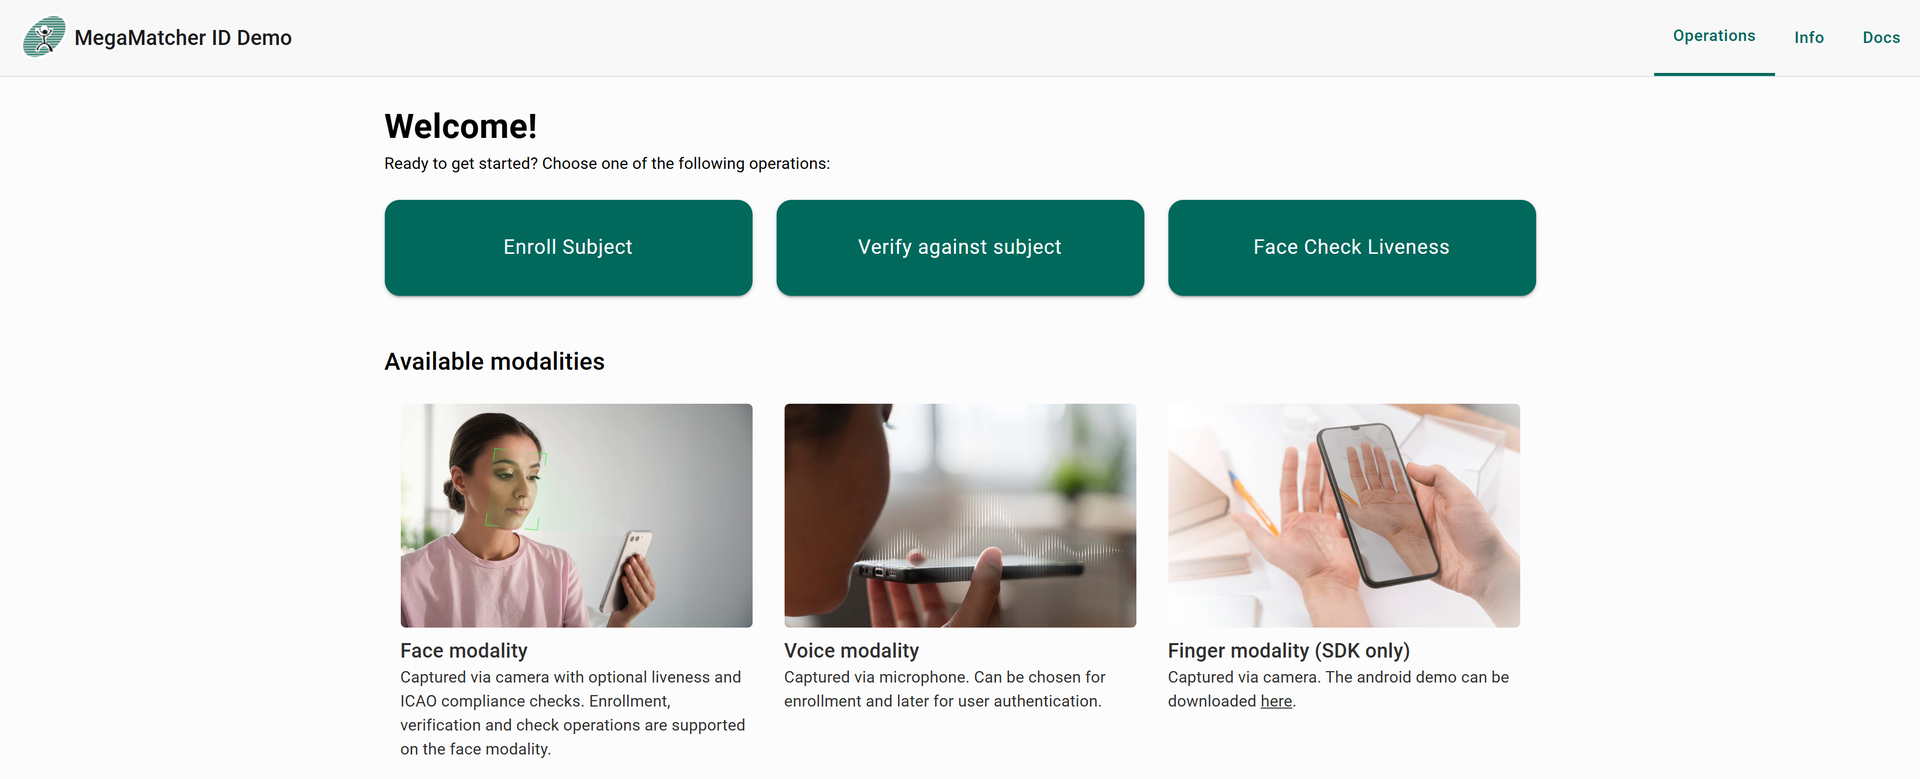
Operations
The main functionality of the demo, to show enrollement, verification and checks operations
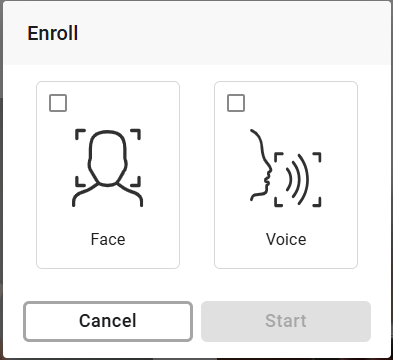
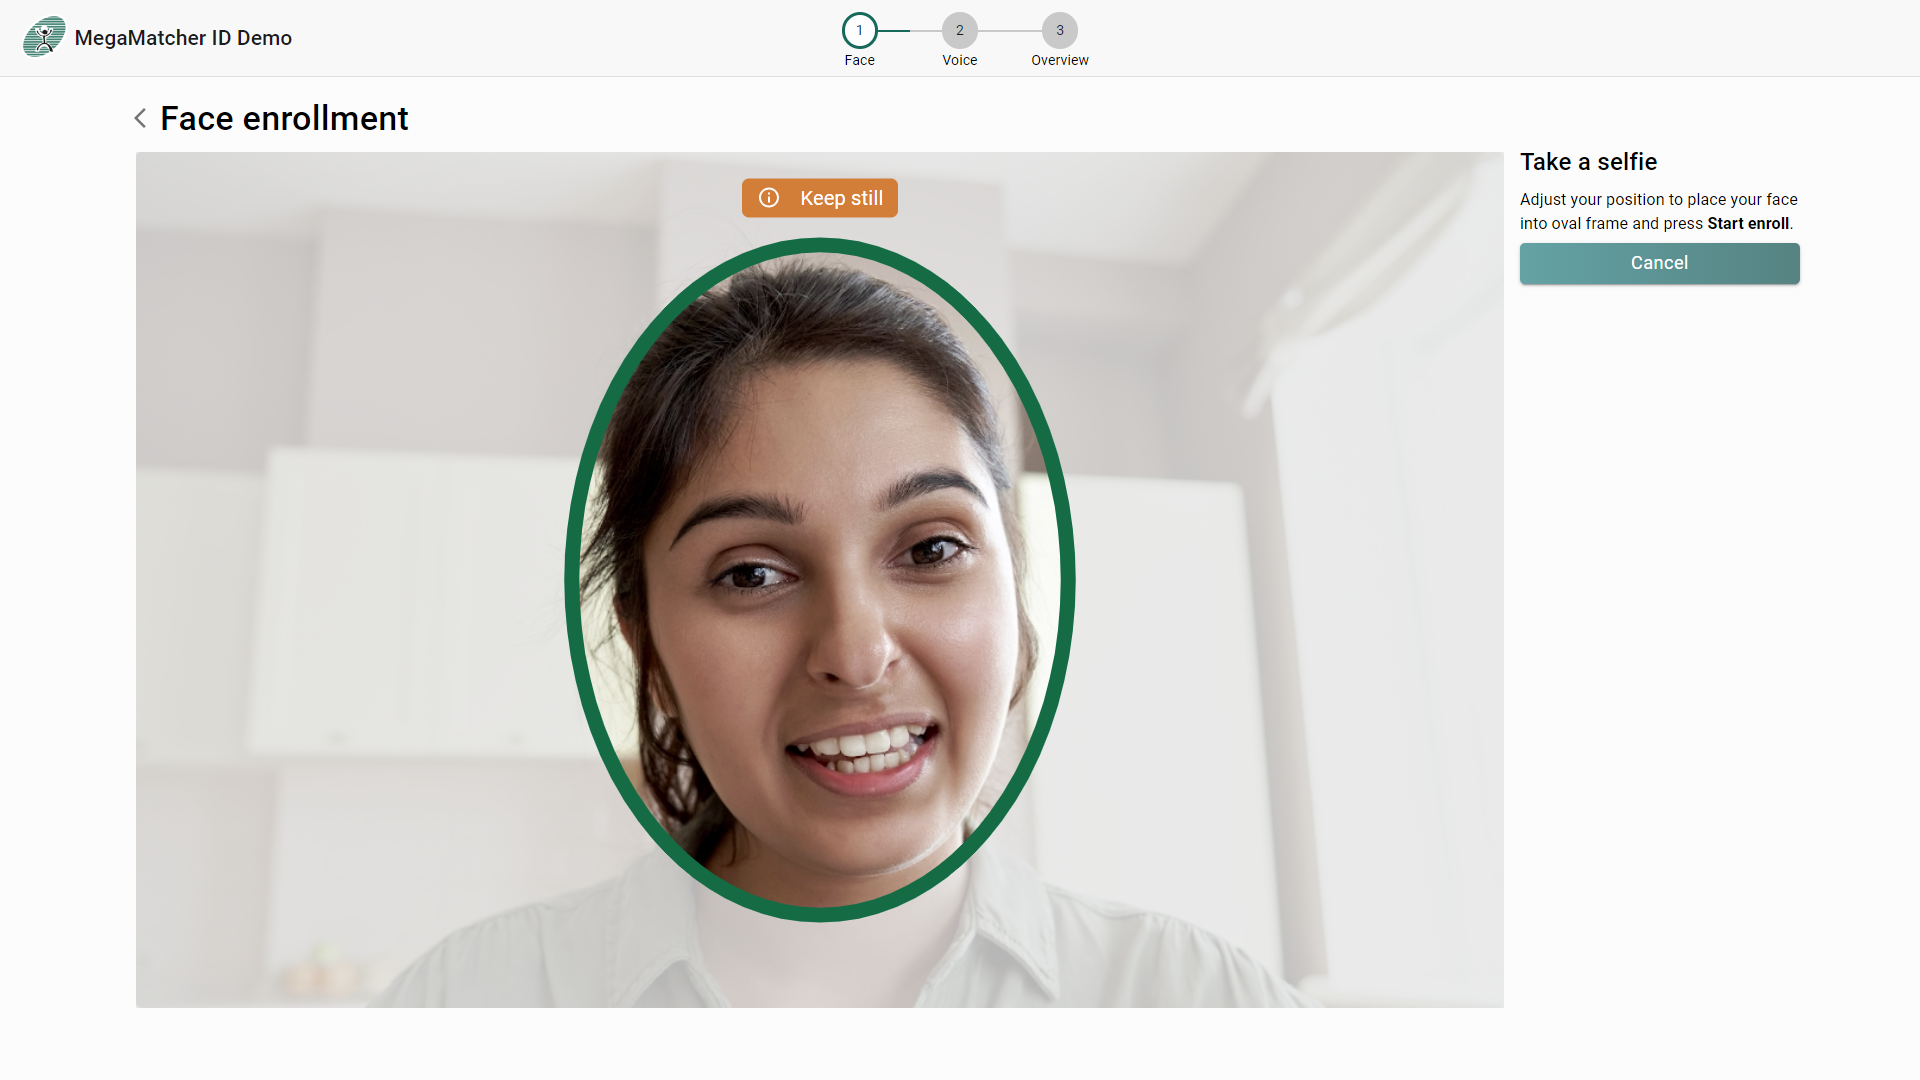
Enroll
Enroll operation is used to start capturing a face and then add it to a database. Enrolled subjects can be verified later. After clicking Enroll user will be asked to enter the subject id that will act as the users identification in the database:

Then select which modalites to enroll:
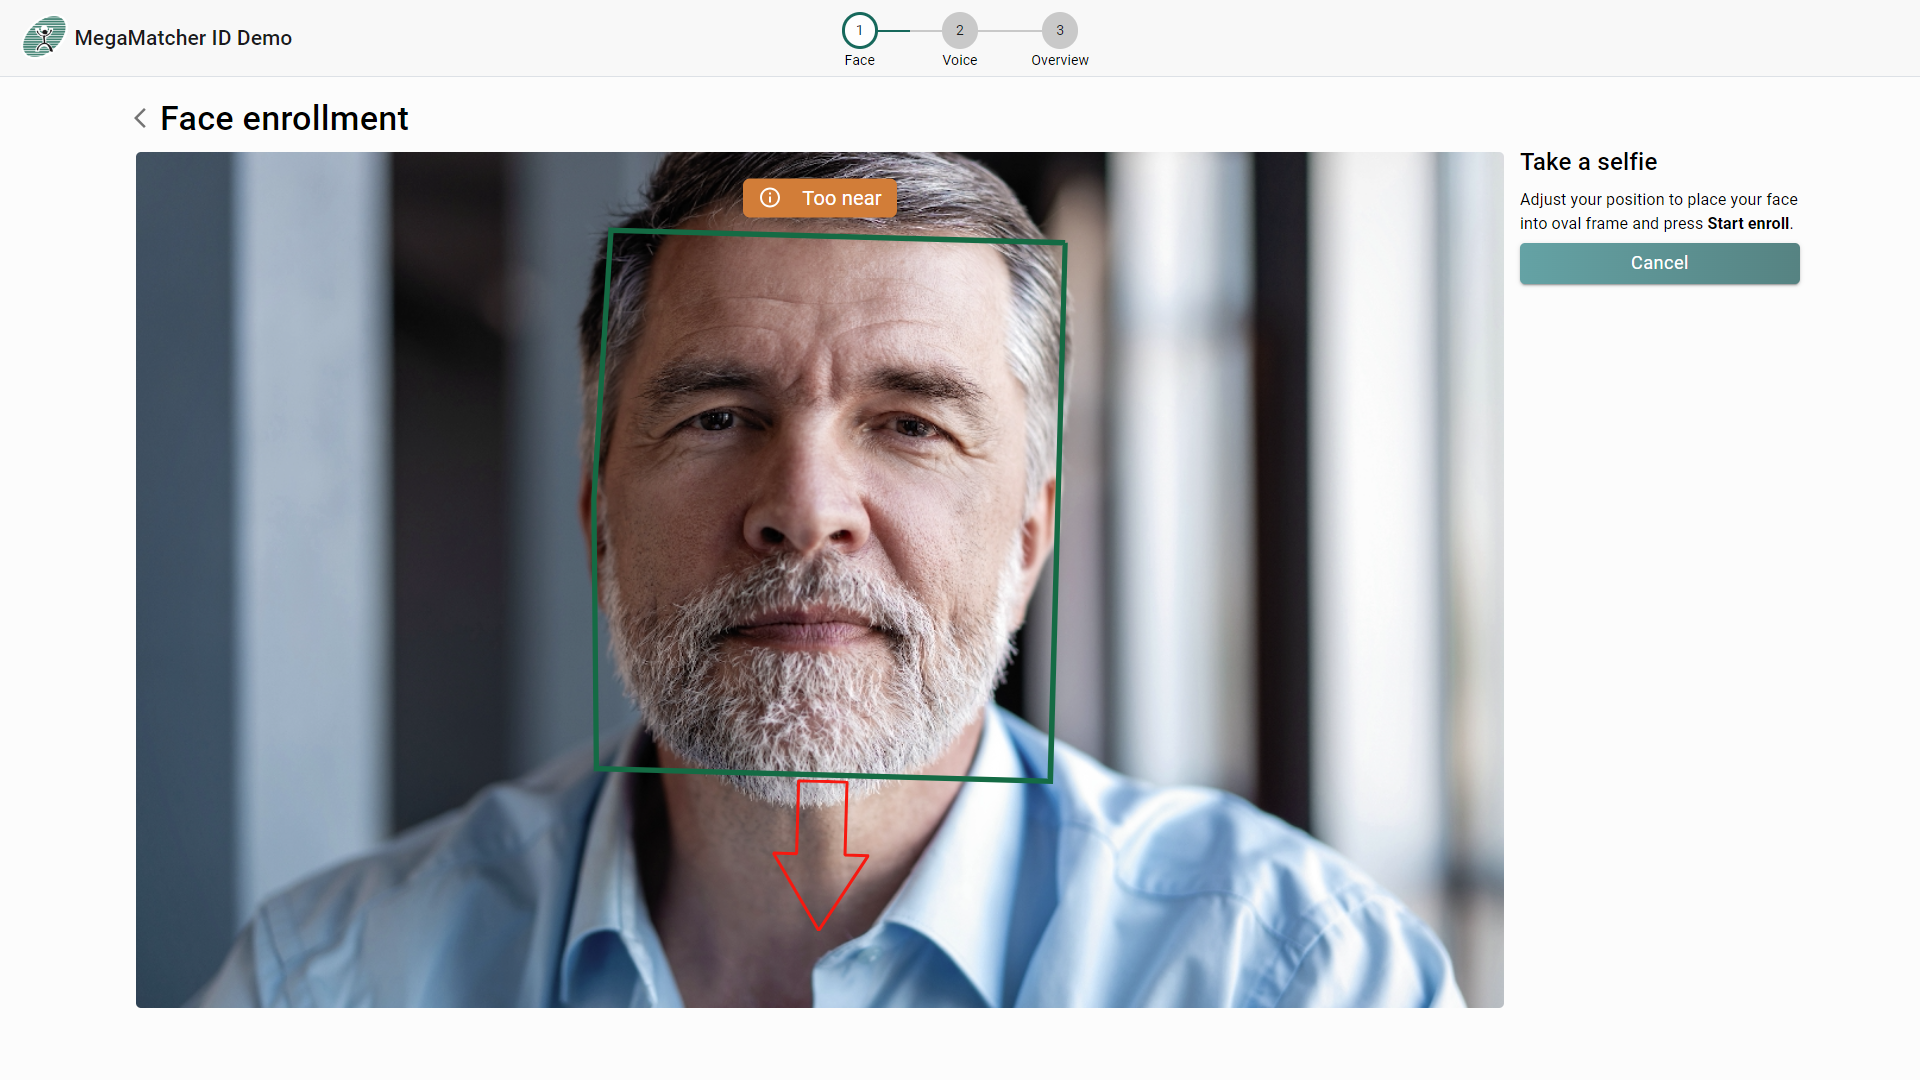
After submitting, enrollment will be started and on success the subject will be added to the database if more then one modalities are selected, then enrollment of the next modality will be started.
Face modality:
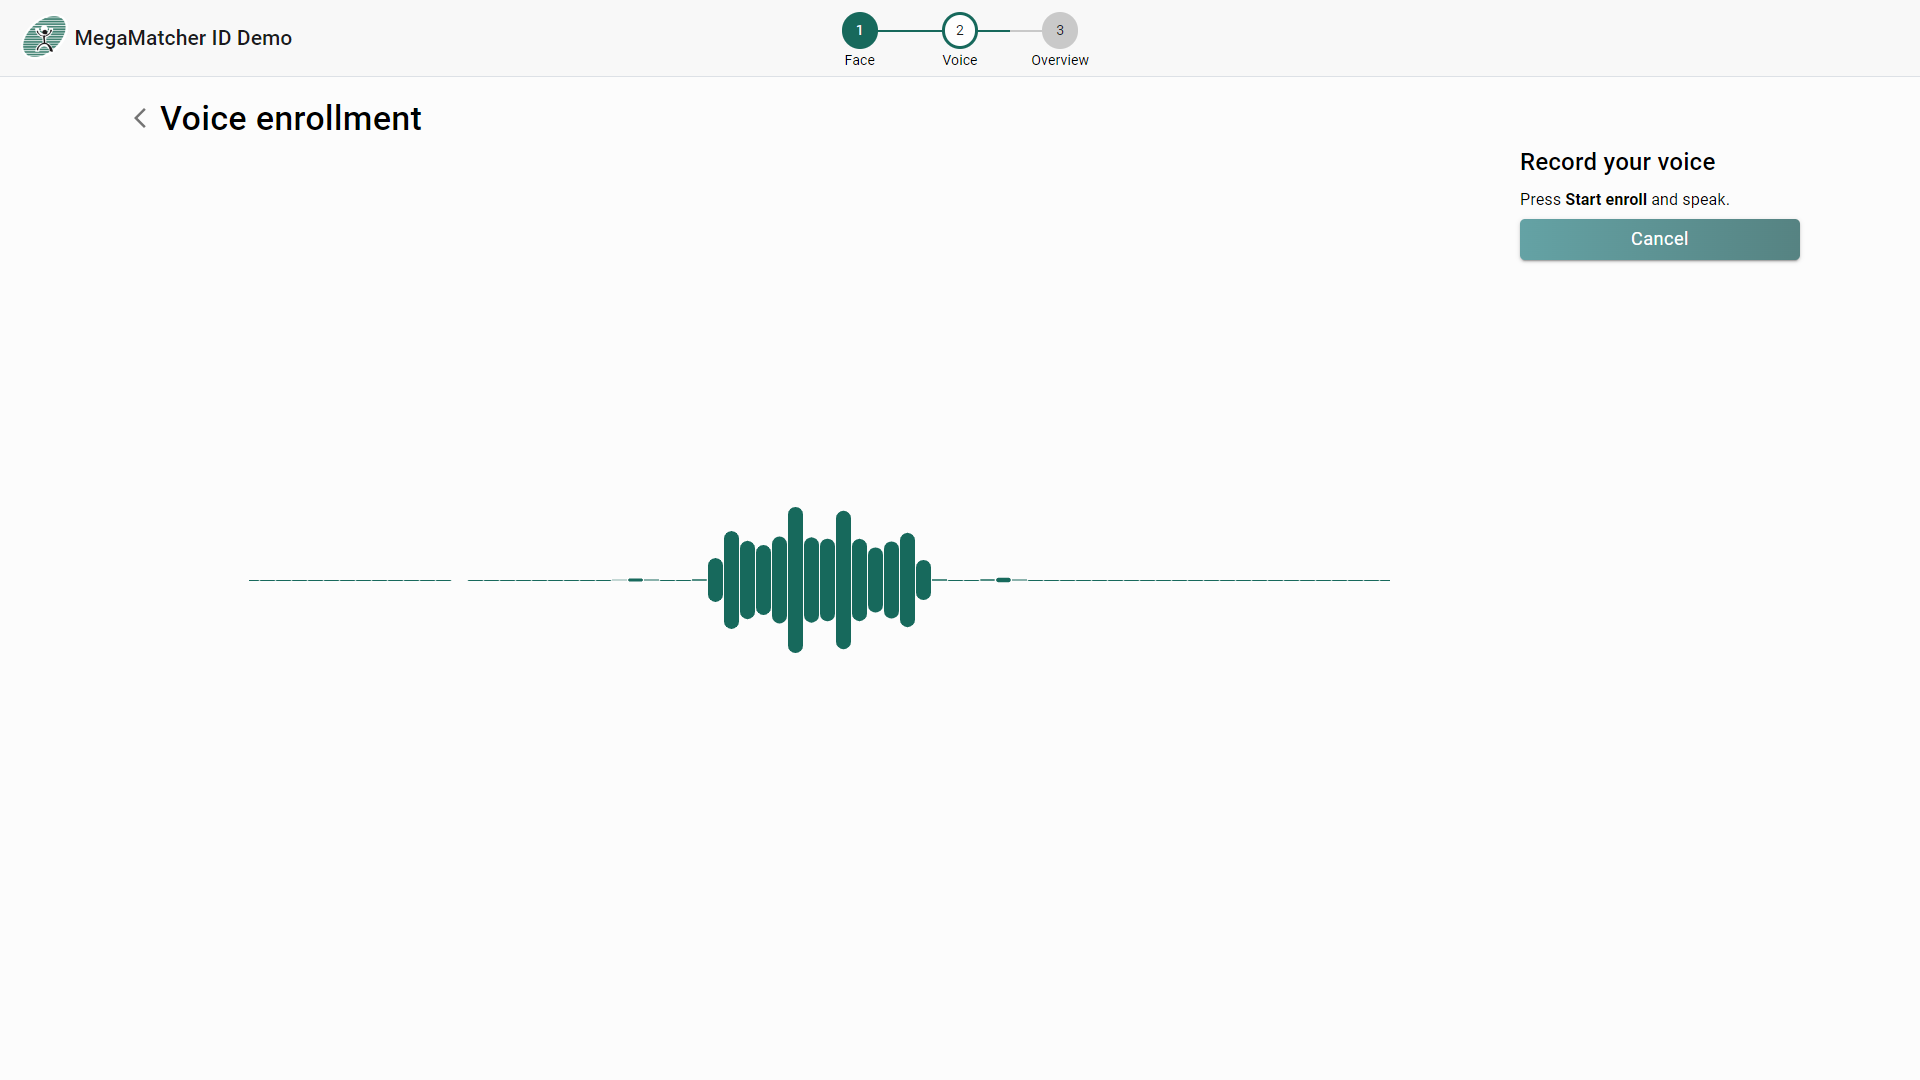
Voice modality:
Success or other status will be prompted to the screen, on complete enrollment of all selected modalities overview will be prompted:
Verify
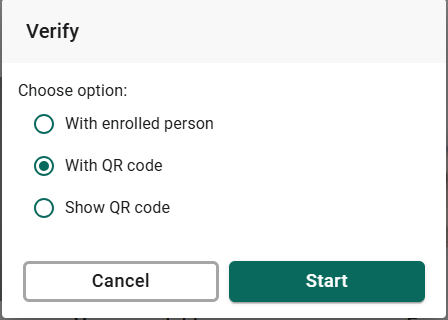
Verify operation is used to check if the person is the same as in the database. After clicking Verify you will be asked to select one of three options:
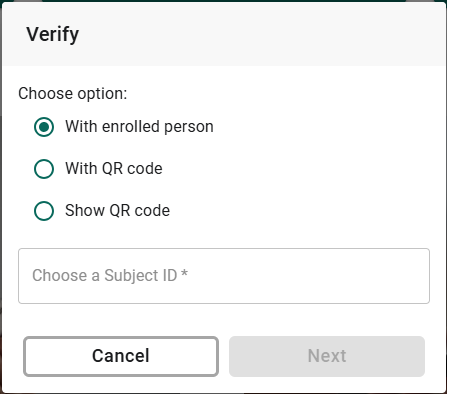
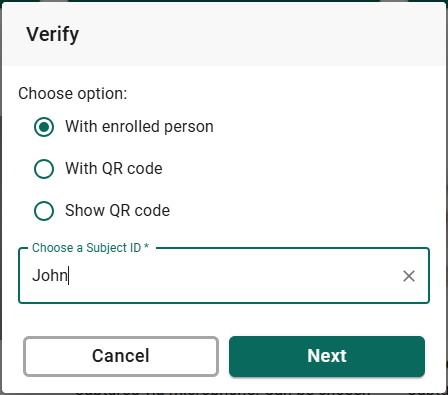
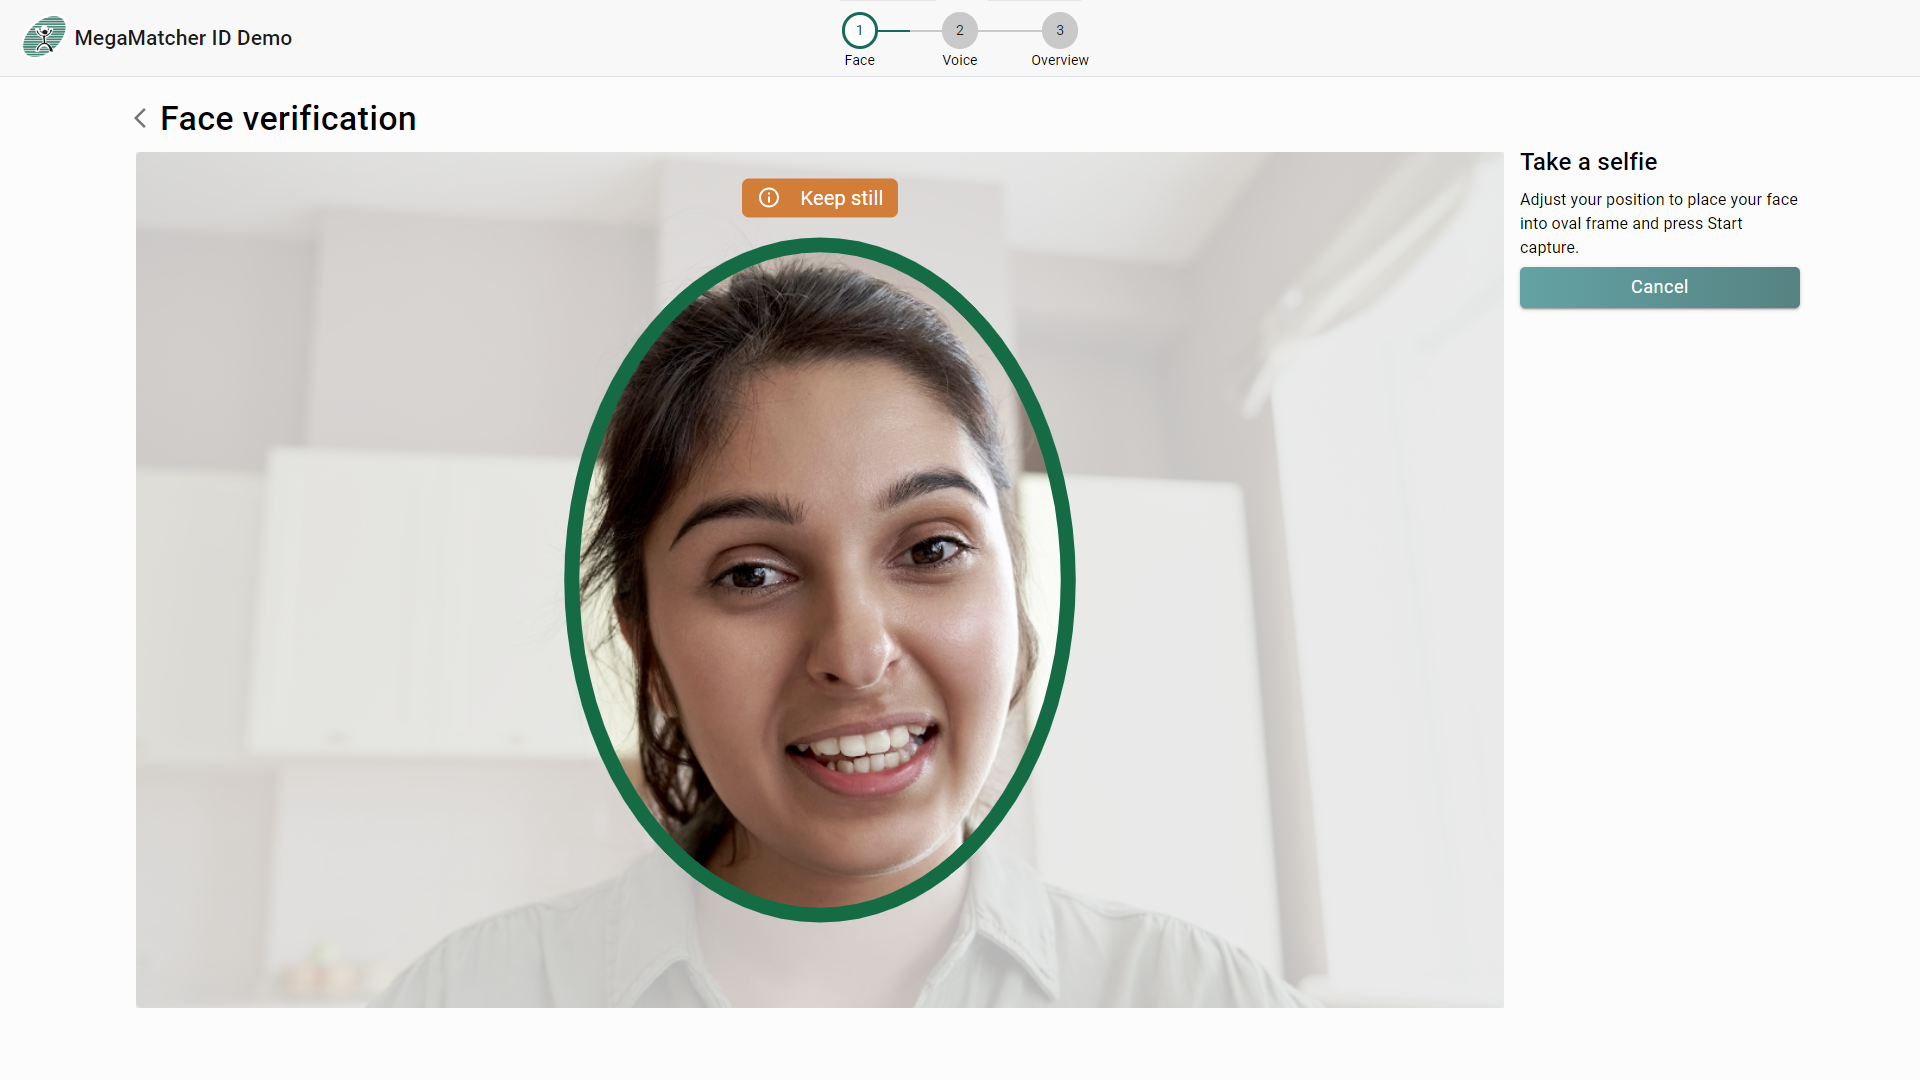
With enrolled person
With enrolled person workflow is similar to enroll, enter the subject id, select which modalities to verify with (look at enroll).
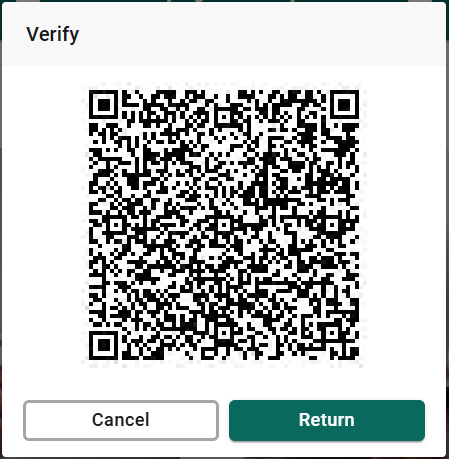
With QR code
With QR code allows to use QR code to verify with a person, requires to have a QR code which you can get from Show QR:
First scan the QR code:
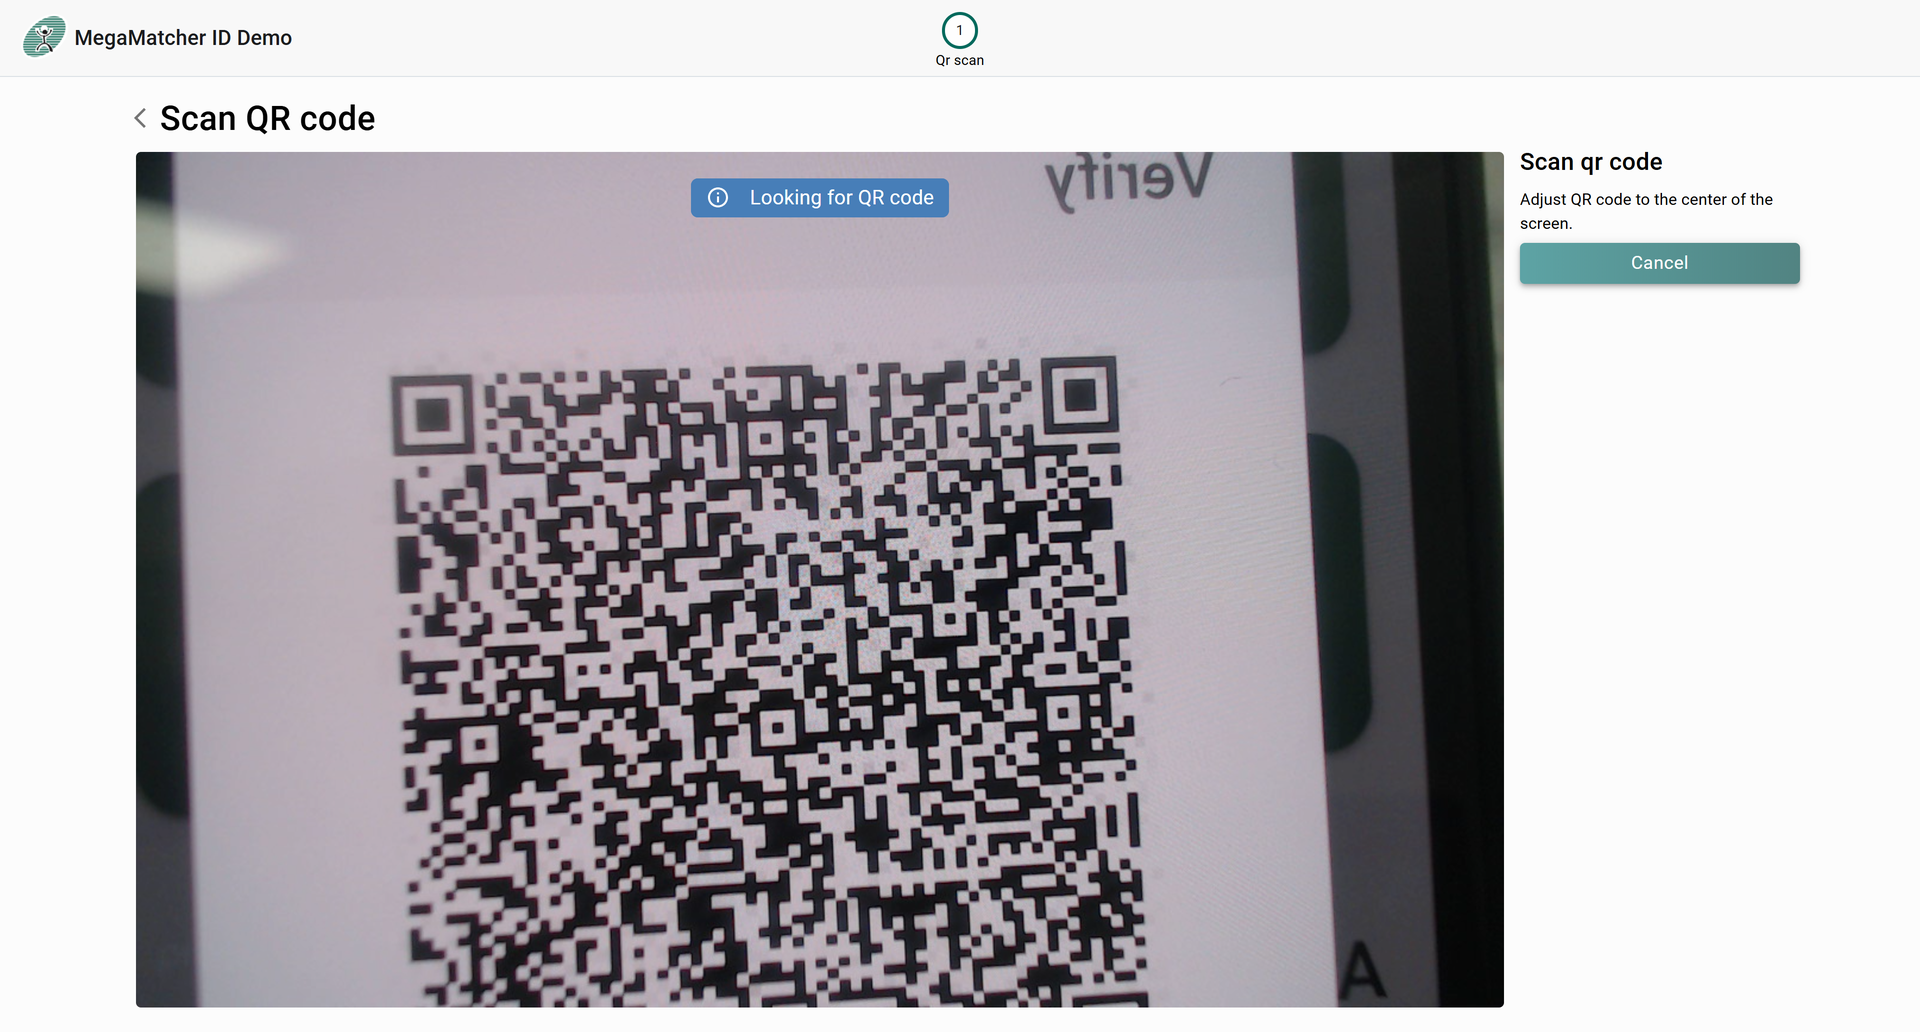
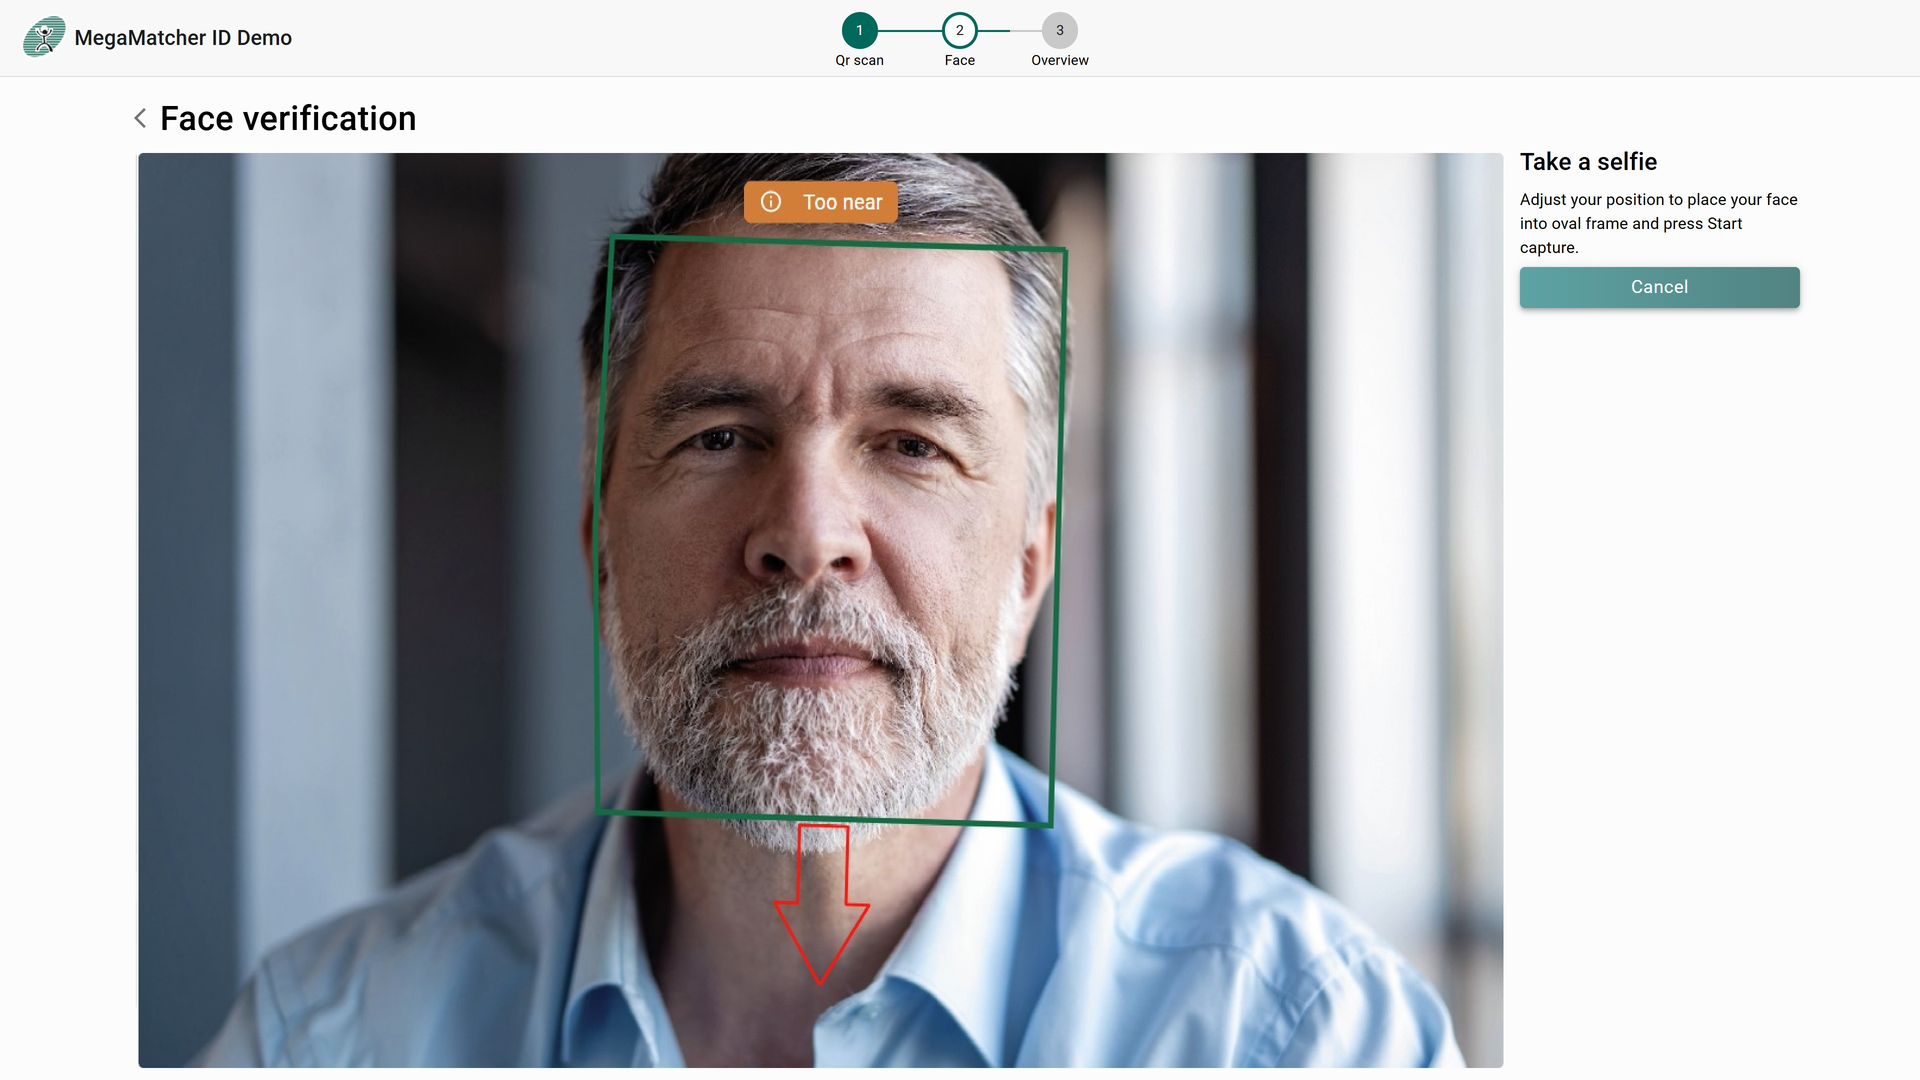
Then scan the appropriate modality when prompted:
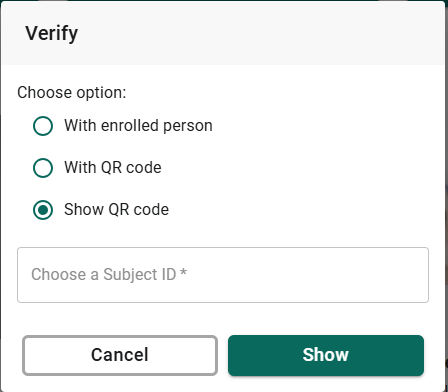
Show QR code
Show QR code shows QR code of a subject to be verified with, which can be used with with qr codeWith qr code verification:
Checks
Checks operation depends on what setting is enabled (see Liveness and ICAO) default being check liveness.
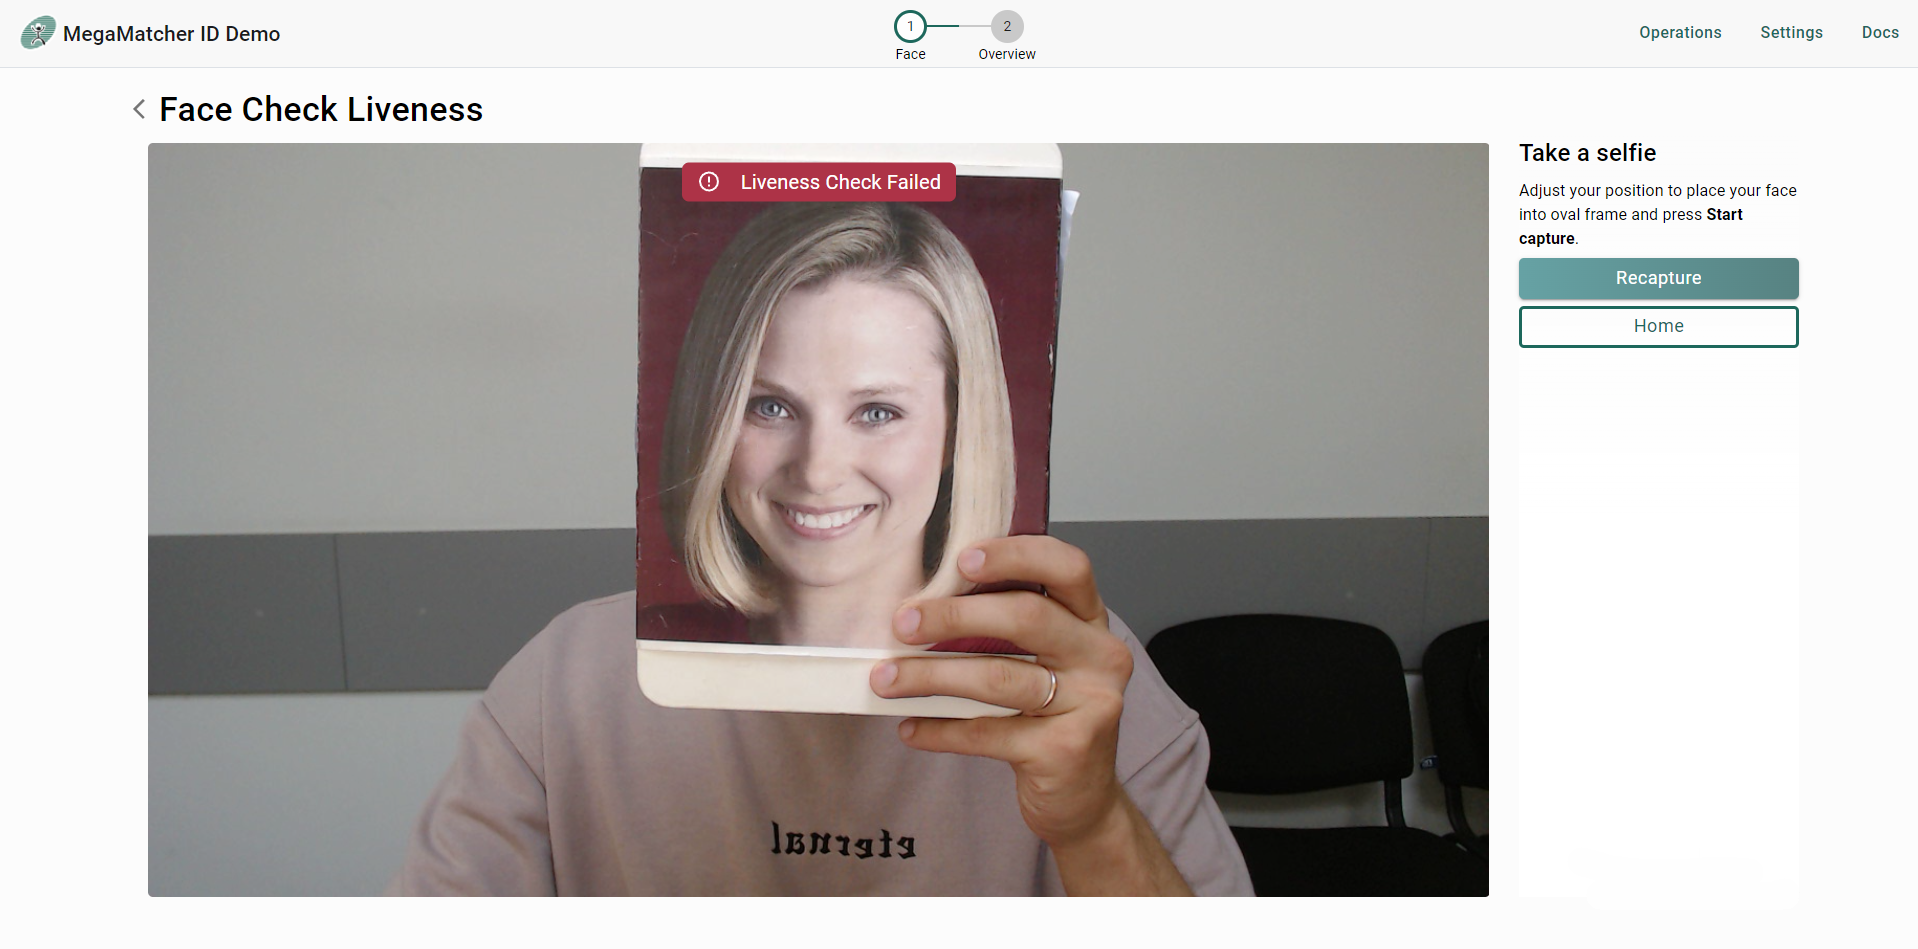
CheckLiveness
Used to determine if the face behind the camera is a real person or a spoof. Ideally, if the face is real, capturing result is Success, otherwise, if printed face is used, SpoofDetected should be returned.
Check ICAO
Used To achieve ICAO compliant image, user is instructed to position its face according ICAO standard. If the face does not met ICAO requirements operation will not end the capture until Timeout is reached.
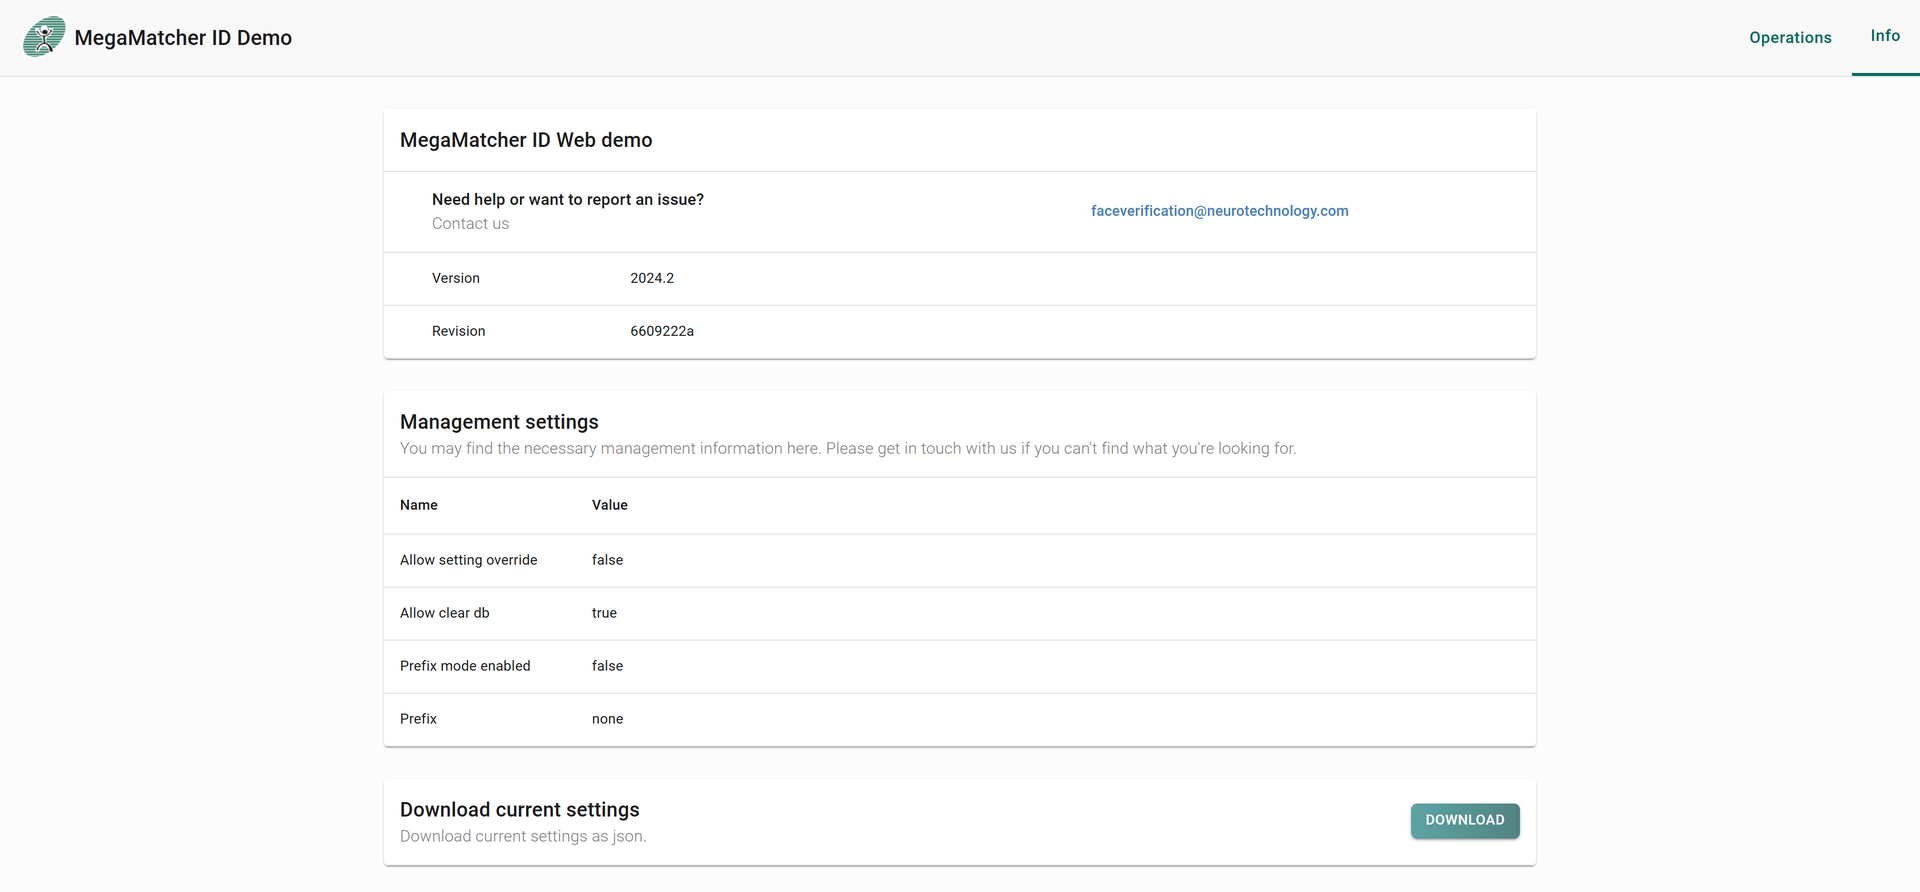
Settings/Info
There are different types of settings on MegaMatcher ID Server. Settings on web demo used for debug purposes while determining most suitable parameters for users application. Can be used when Allow settings override is enabled if disabled will show info tab instead.
Info
Show basic info for the user.
Settings
There are different types of settings on MegaMatcher ID server, which are devided to few different tabs For more detailed explanation see here.
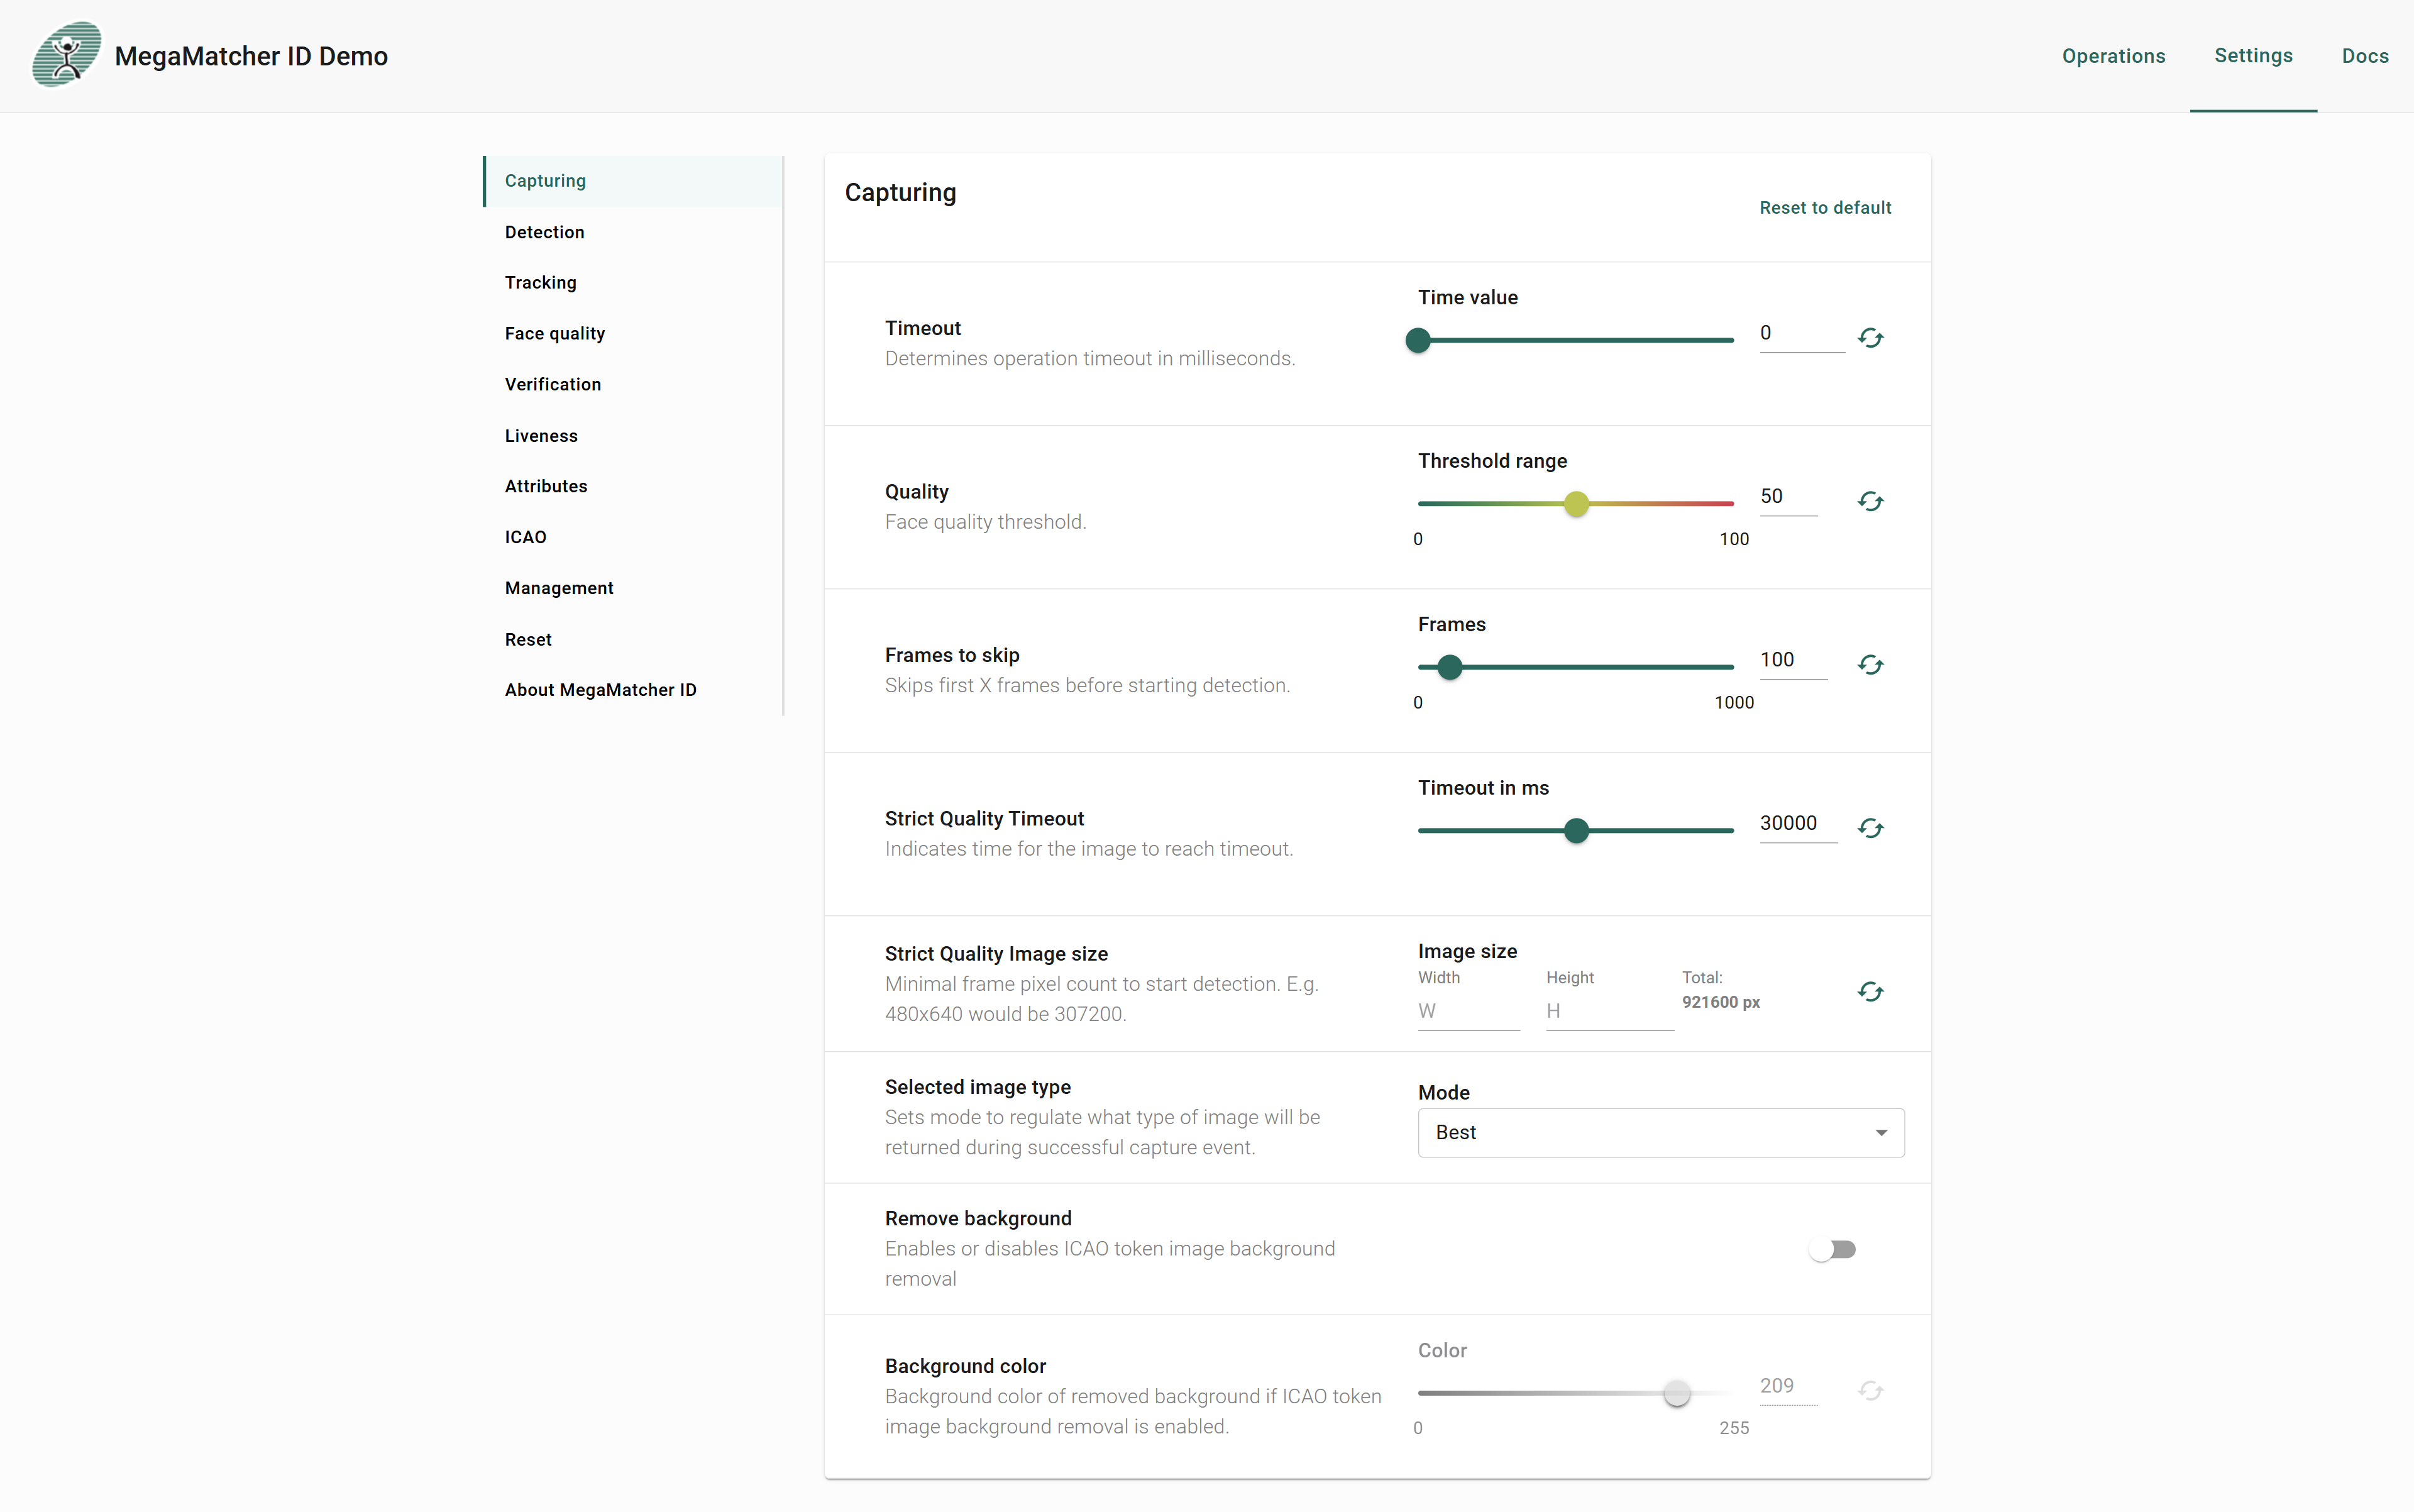
Capturing
Controls core capture behavior such as operation timeout, face quality threshold, frames to skip, and background removal. For detailed parameter descriptions see Capturing settings.
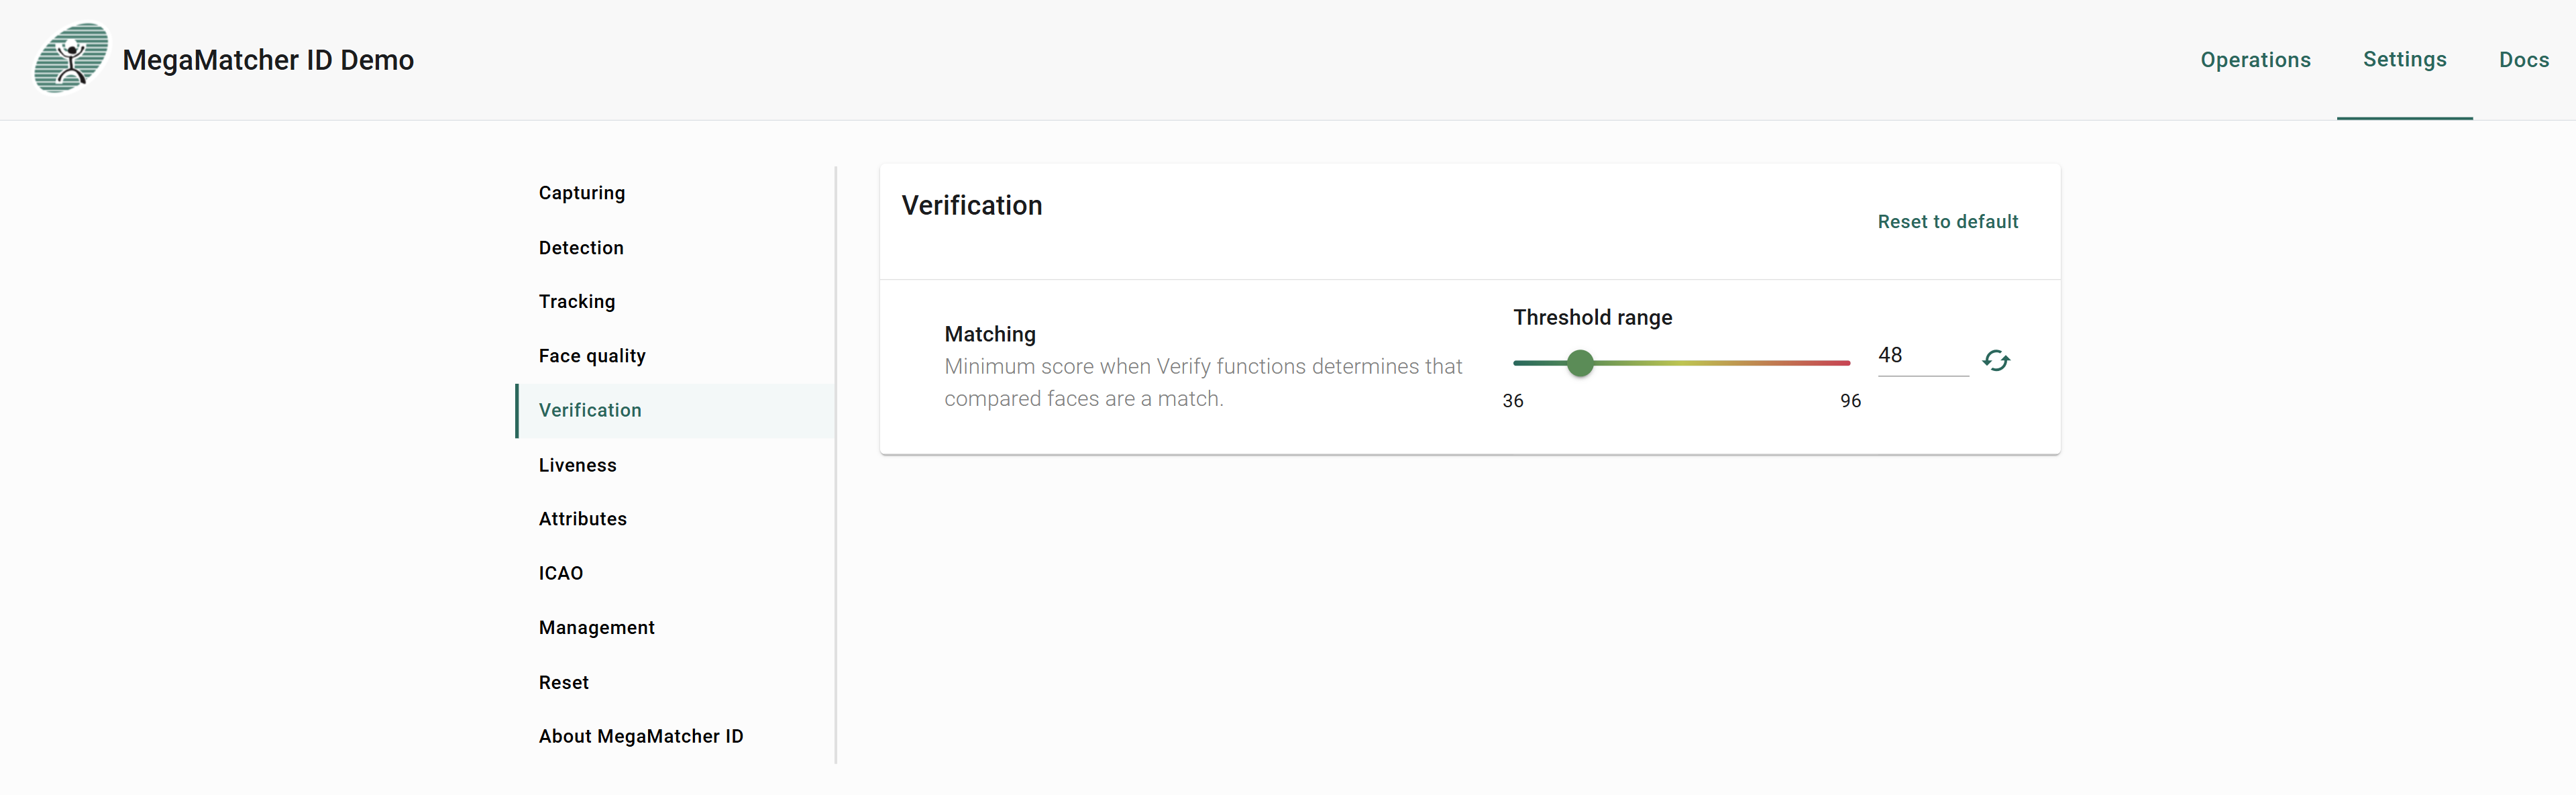
Verification
Controls the matching threshold that determines when two faces are considered a match. For detailed parameter descriptions see Verification settings.
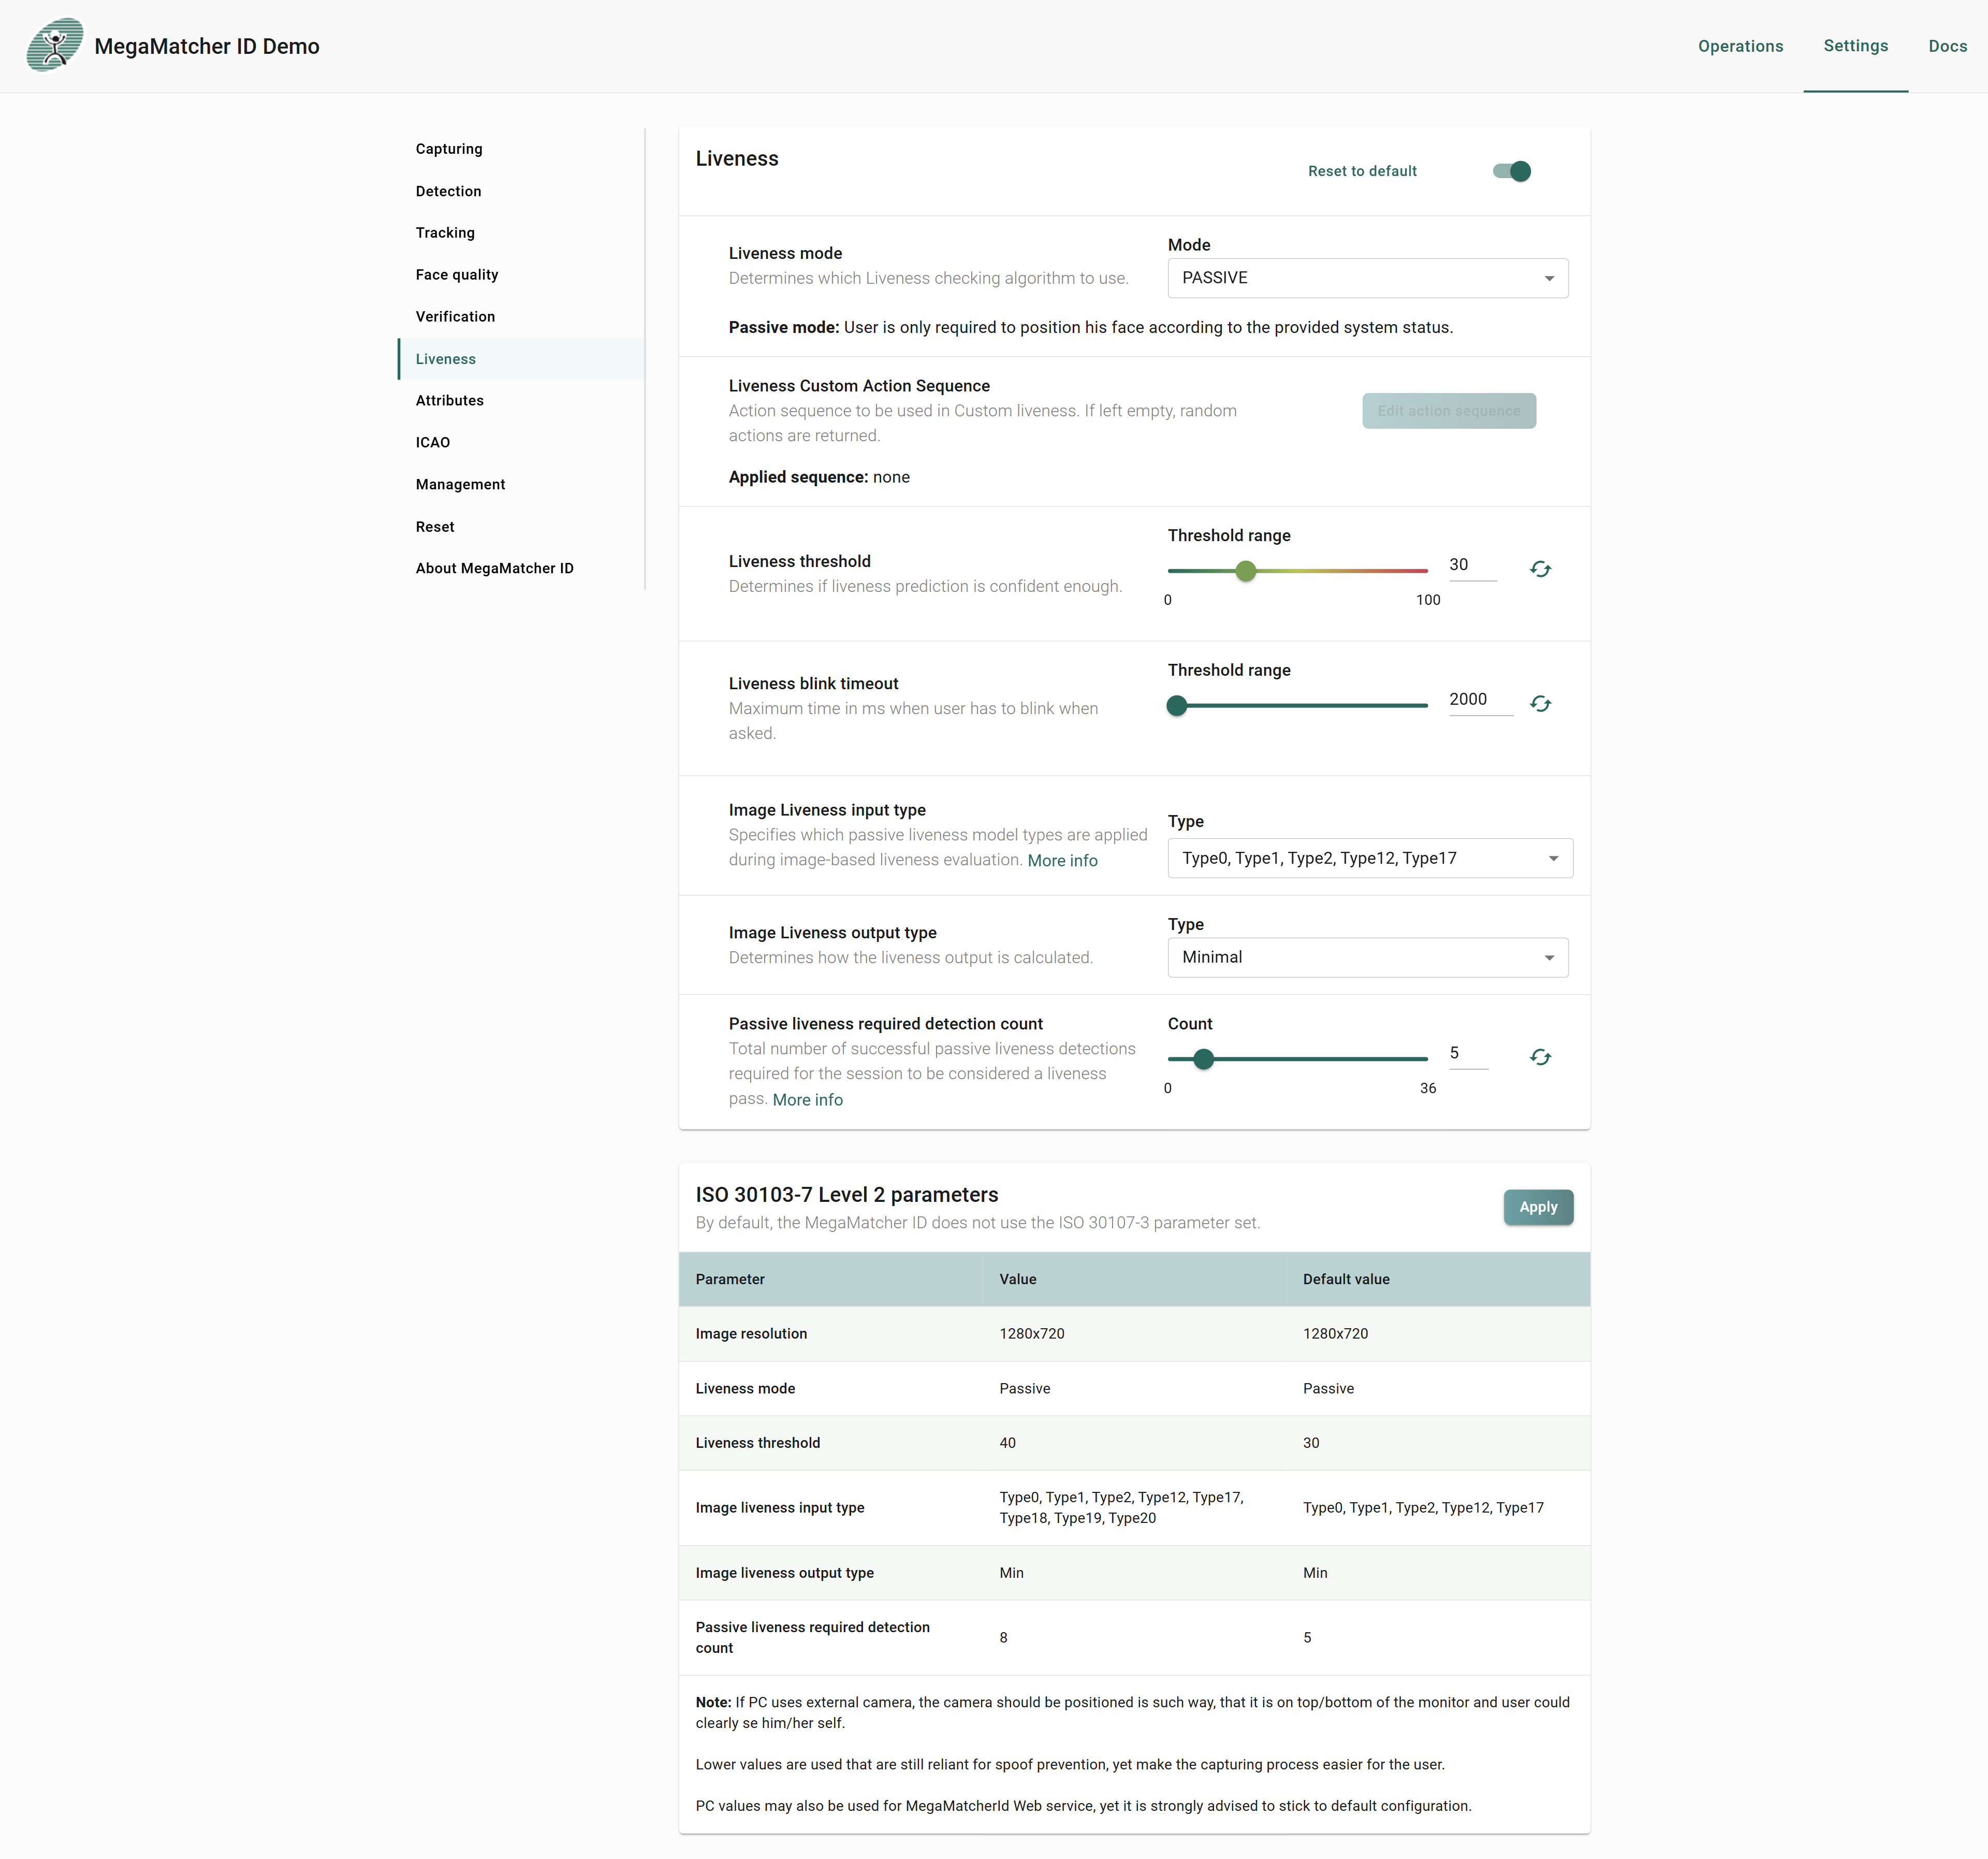
Liveness
To use Liveness you first need to enable it using the switch at the top right. Then Liveness settings will become active. Liveness custom action sequence is only used in the custom liveness mode and thus is only available when custom liveness mode is used. To enable ISO 30107-3 level 2 settings press Apply next to the parameters, you will then be prompted on what settings to use: PC or mobile. After you apply the settings, it will automatically change the appropriate parameters from the table. For detailed parameter descriptions see Liveness settings.
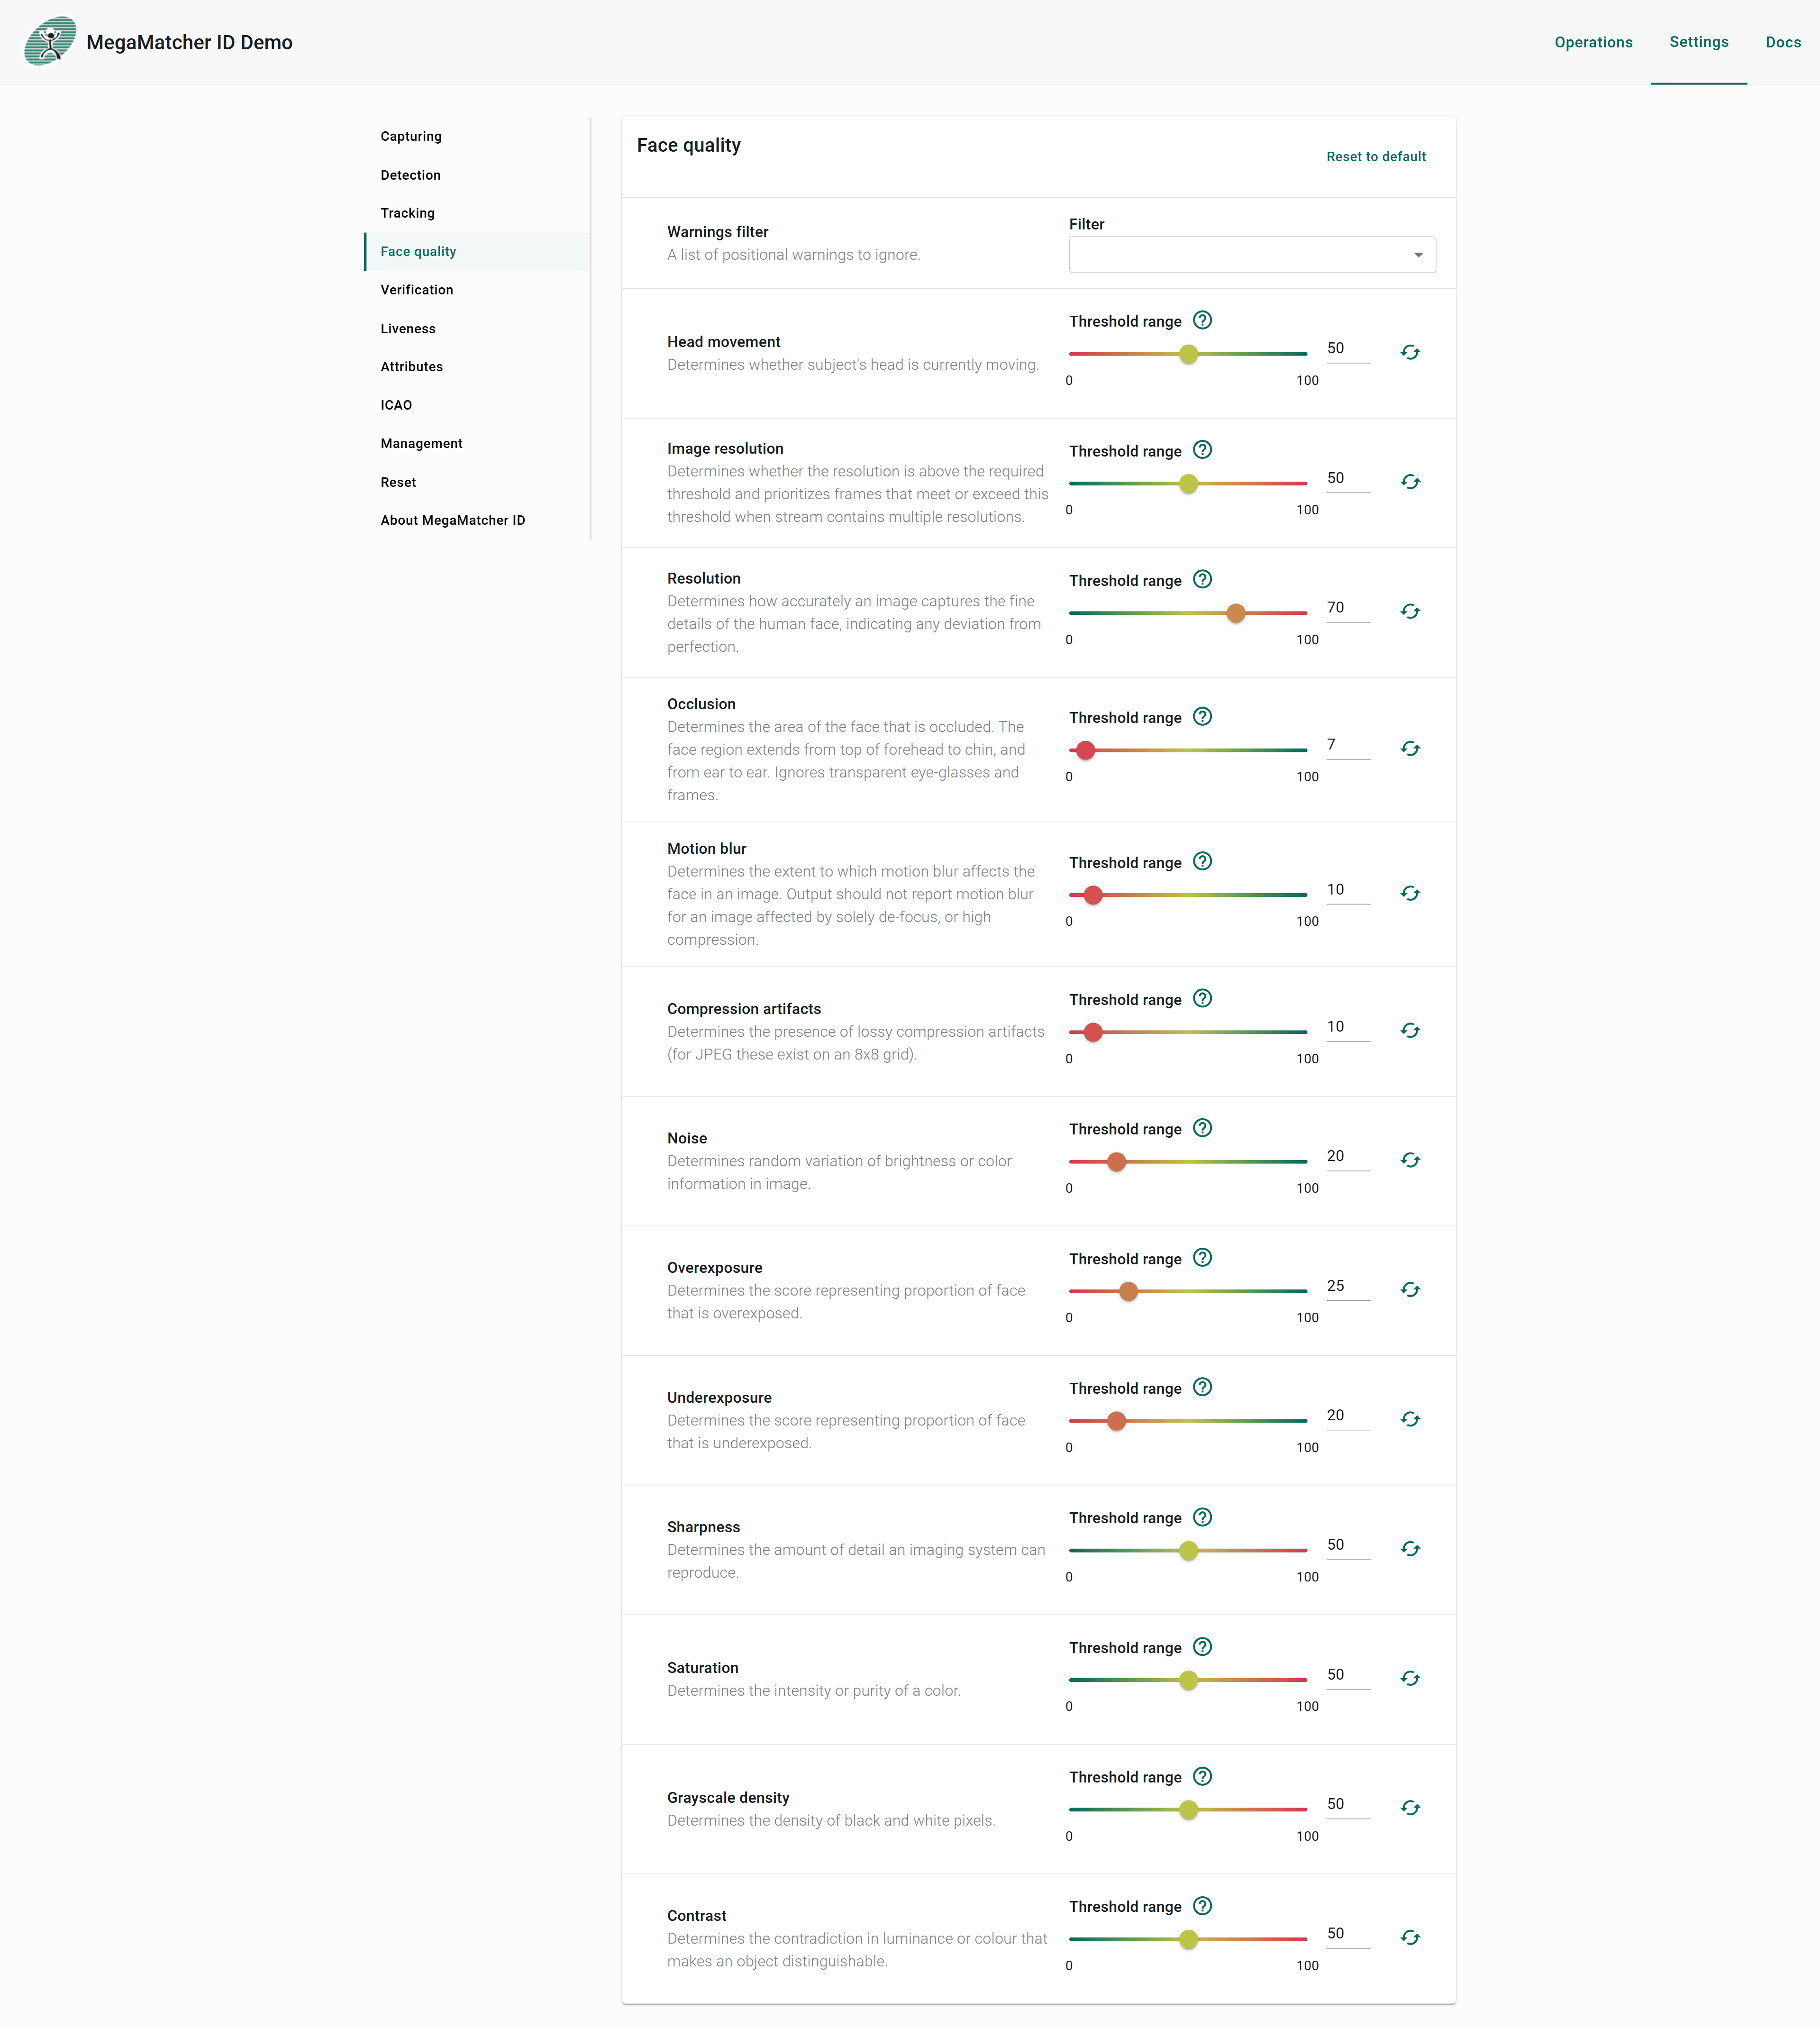
Face Quality
Face Quality Assessment evaluates the reliability of a captured face image for biometric matching. Settings here control thresholds for quality metrics such as sharpness, exposure, occlusion, and noise to ensure only suitable images are retained. For detailed parameter descriptions see Face Quality settings.
Detection
Controls face detection parameters including confidence threshold, inter ocular distance, and maximum allowed head rotation angles. For detailed parameter descriptions see Detection settings.

Tracking
After face detection, the Face Tracking module takes over to continuously monitor facial position and movement across frames. This improves performance and reduces CPU utilization by eliminating the need for full-frame detection on every frame. For detailed parameter descriptions see Tracking settings.
![]()
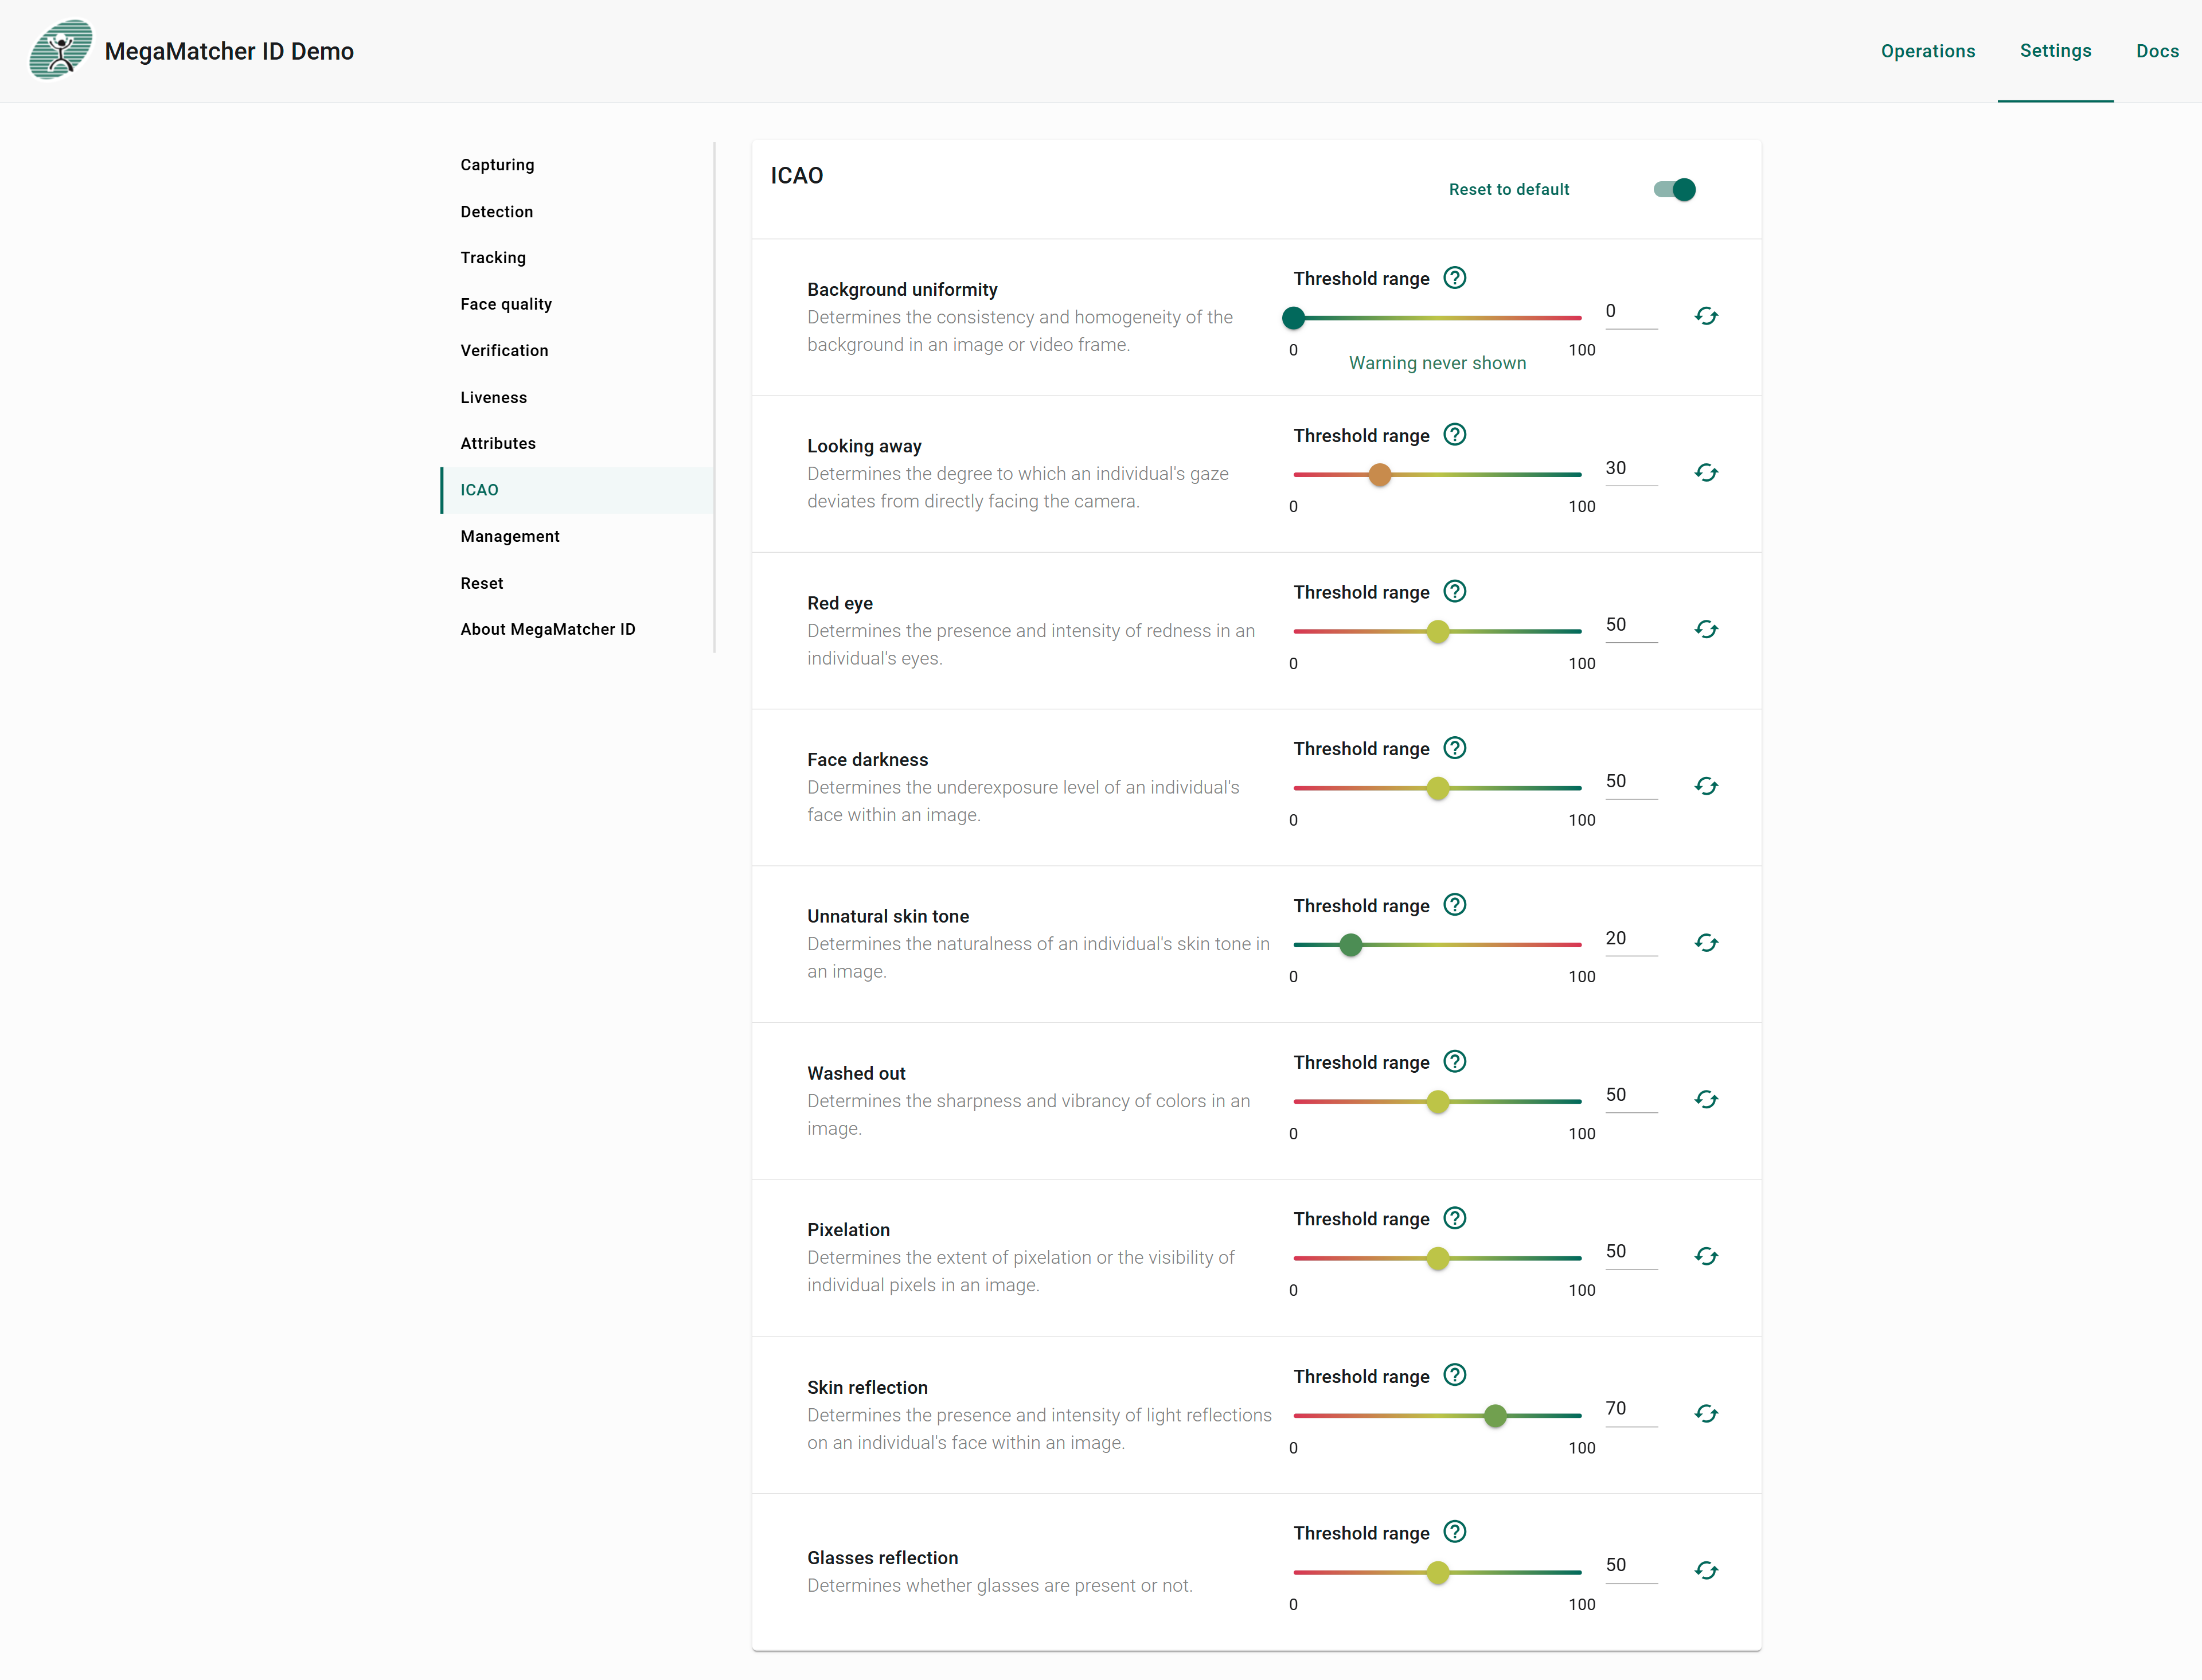
ICAO
To use ICAO you first need to enable it using the switch at the top right. Background color is only used when Remove background is enabled. For detailed parameter descriptions see ICAO settings.
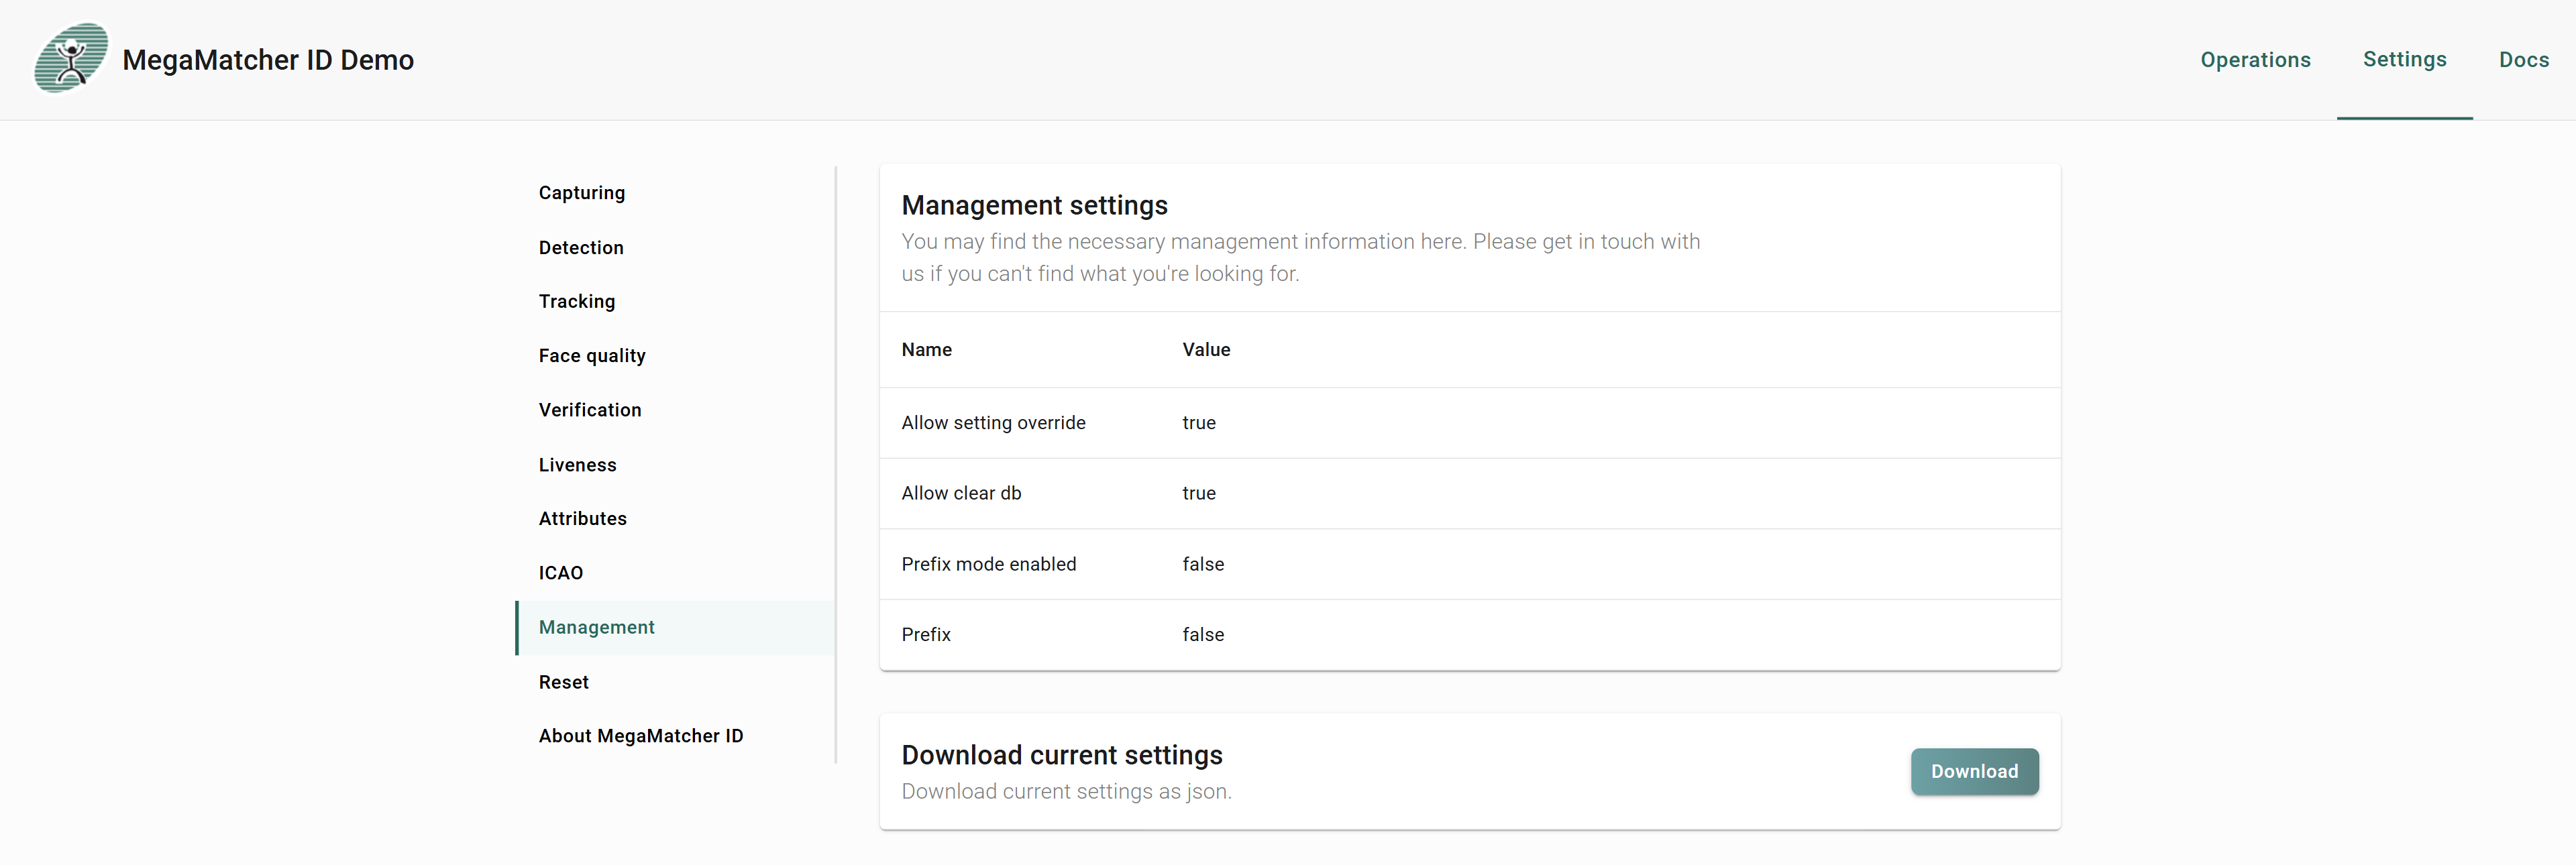
Management
To have the ability to clear database, it needs to be enable on the server settings see development properties.
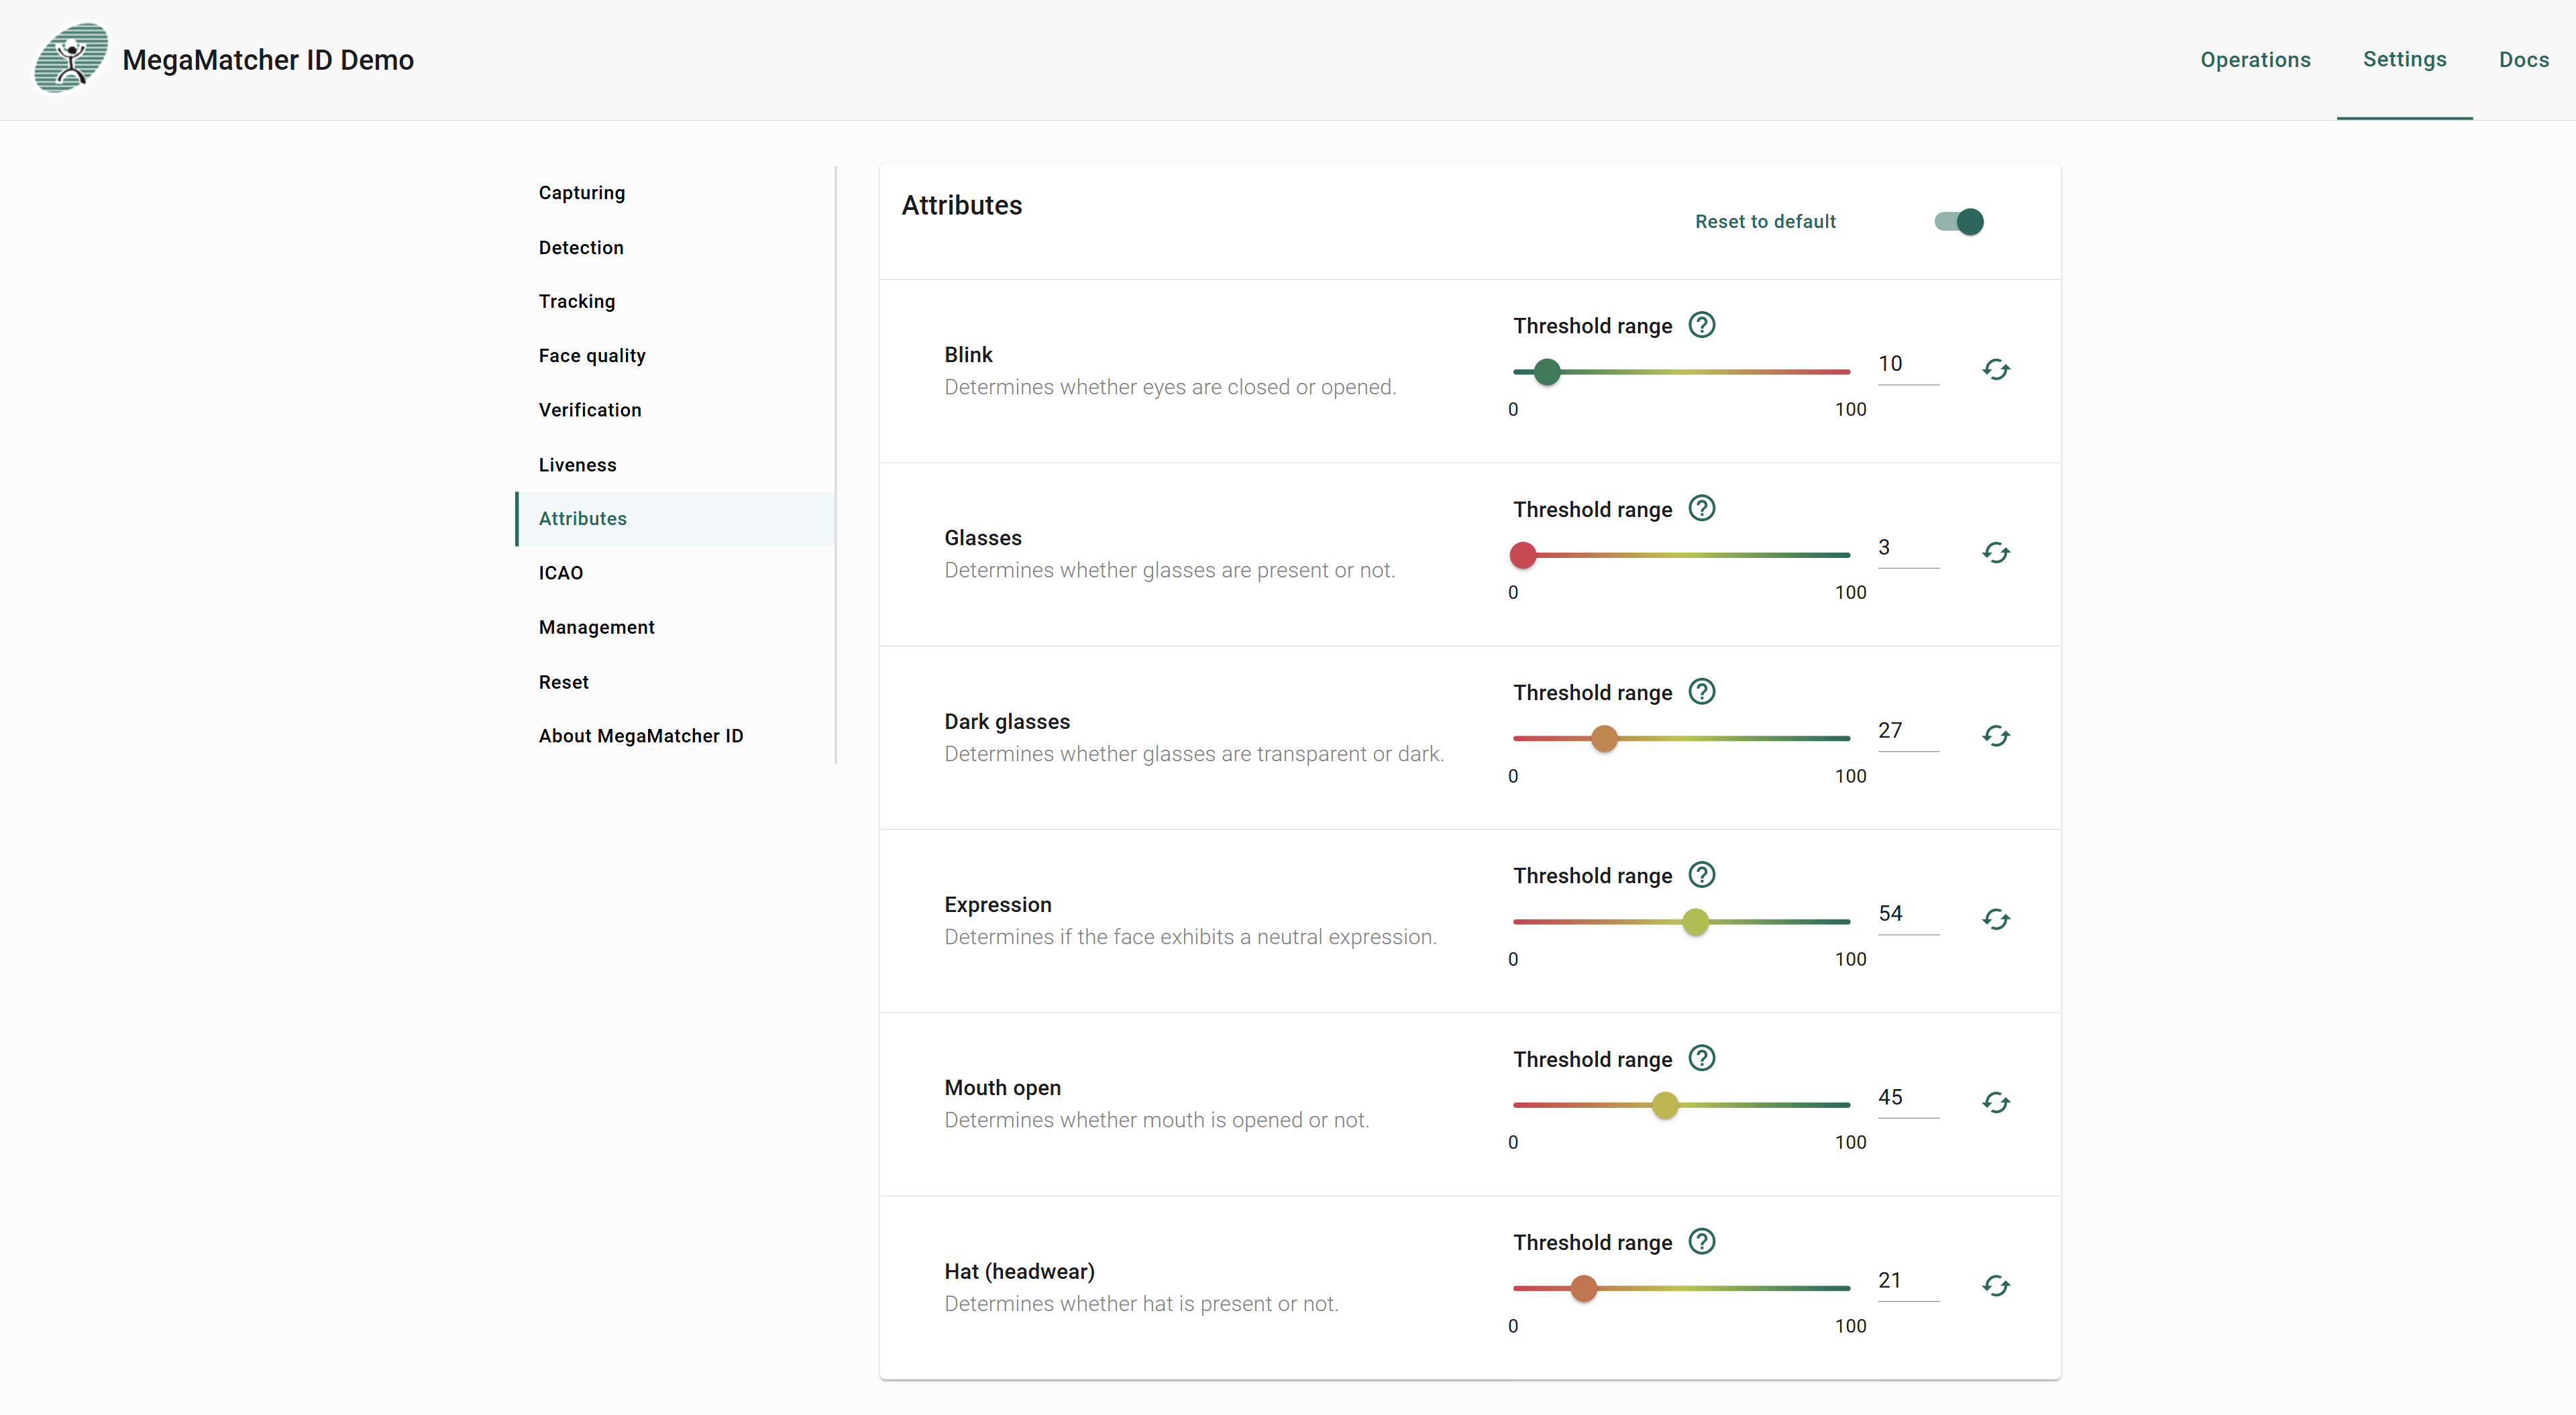
Attributes
Face Attributes settings control thresholds for detecting key visual conditions such as eye state, glasses, expression, and headwear — used primarily to enforce capture quality requirements and produce standardized images. For detailed parameter descriptions see Attributes settings.
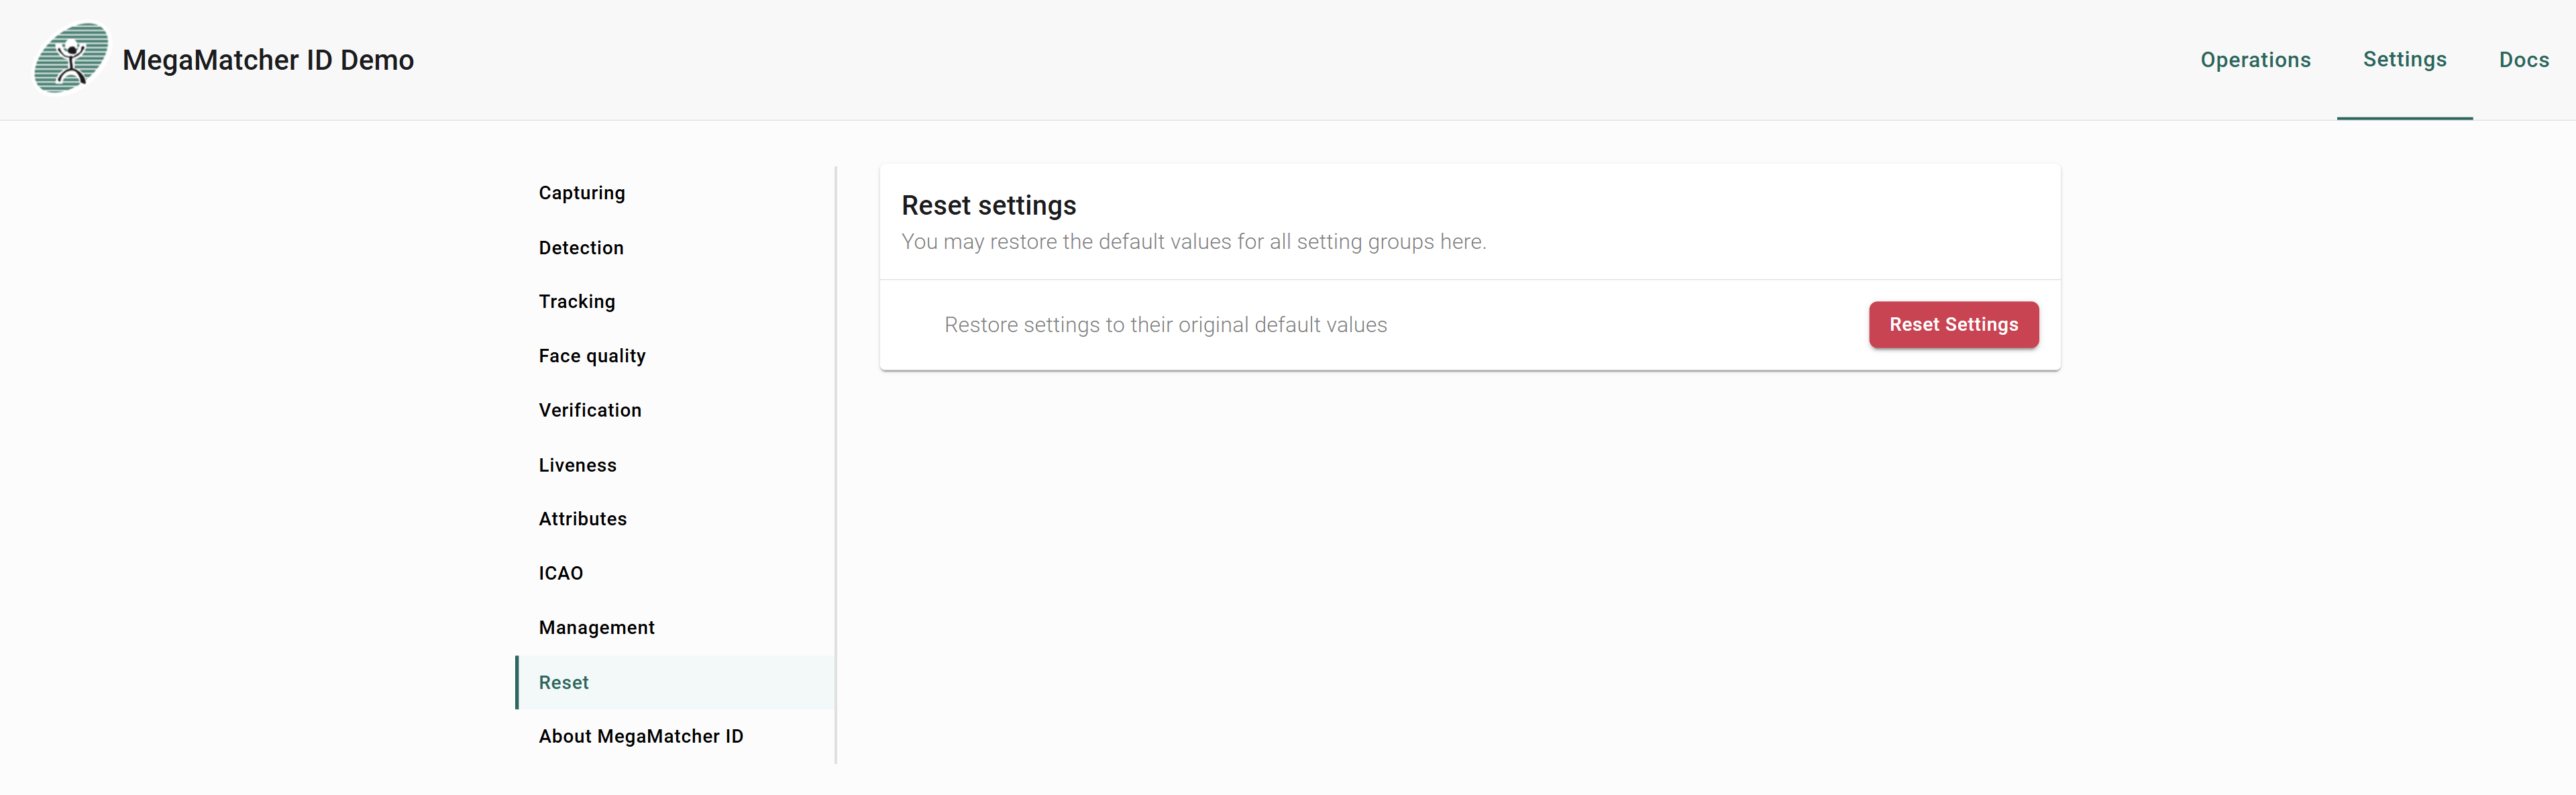
Reset
Allows resetting all biometric operation settings back to their default values.
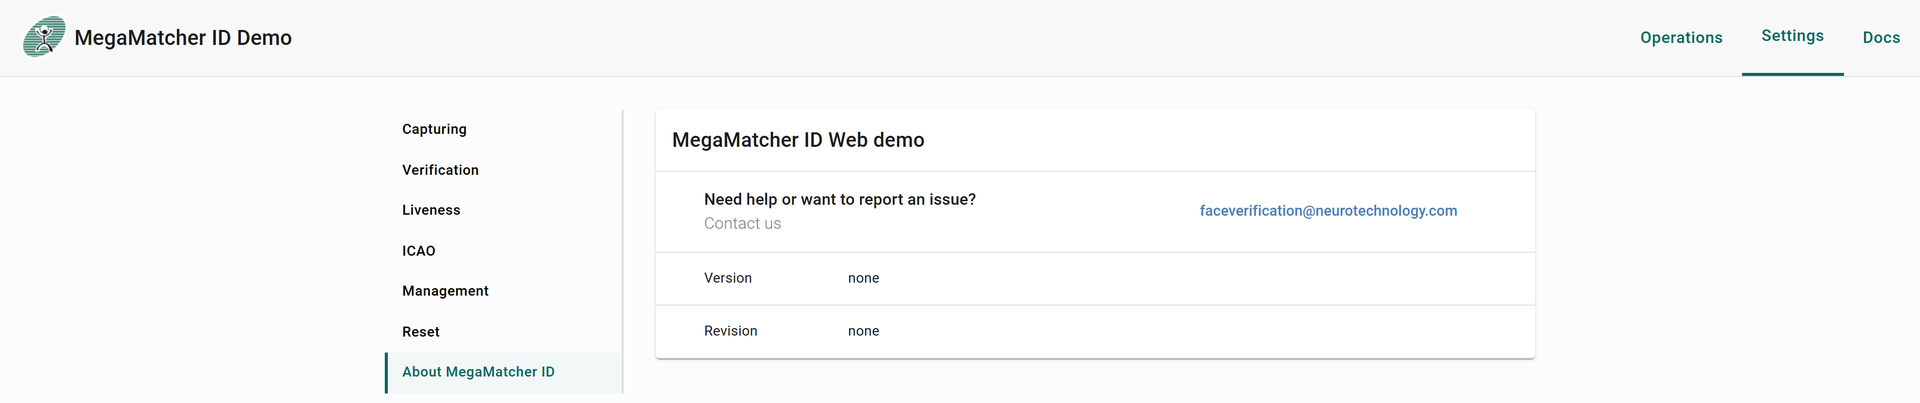
About
Displays current version information for the MegaMatcher ID server components.